Prerequisites
In order to follow this tutorial you’ll need:- A basic working knowledge of HTTP and REST
- An HTTP client for testing, such as Postman or Insomnia
- Basic familiarity with Regular Expressions
- Ideally, some familiarity with JSONPath, but this is not essential as it’ll be explained in the places it’s used.
Setting up
Firstly, you’ll need to sign up for a WireMock Cloud account if you don’t already have one. Once you’ve signed up or logged back in, create a blank mock API in the app.tl;dr
If you just want to take a look at the end result of this tutorial you can select the “rest-example” API template instead of “blank” when when creating a new mock API.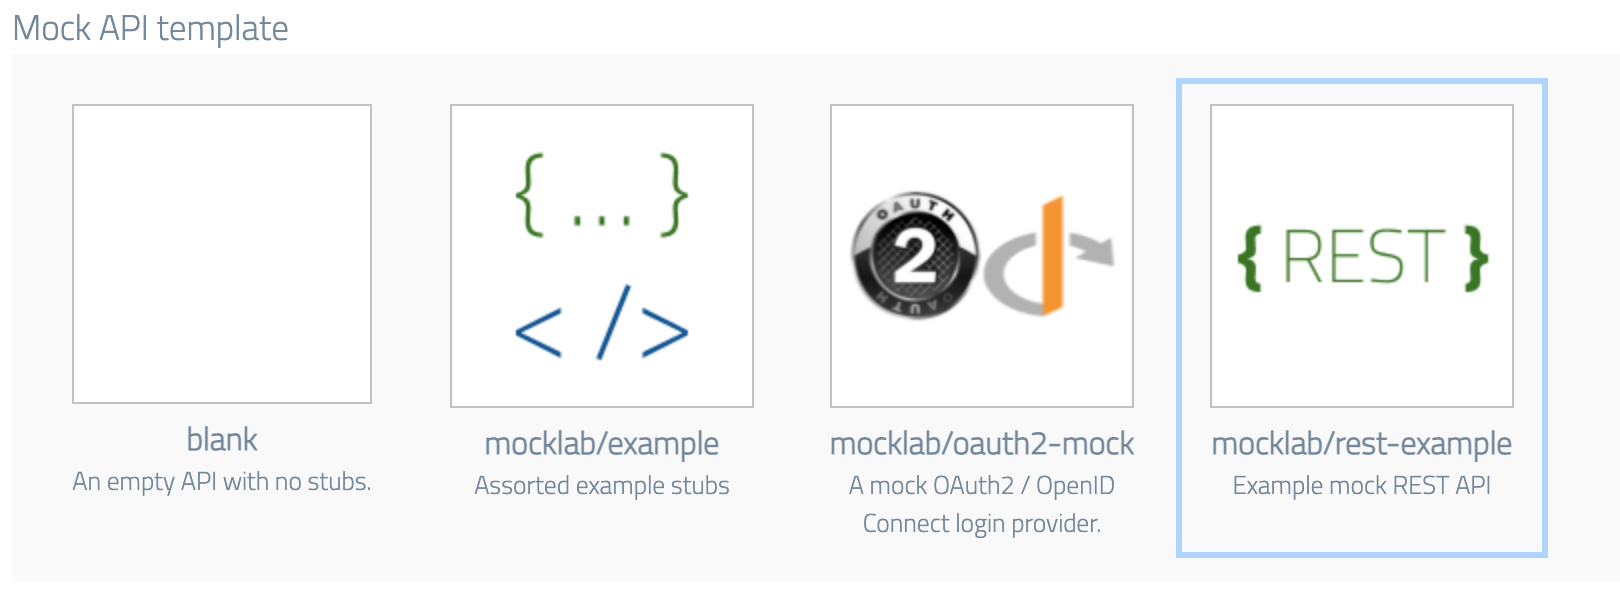

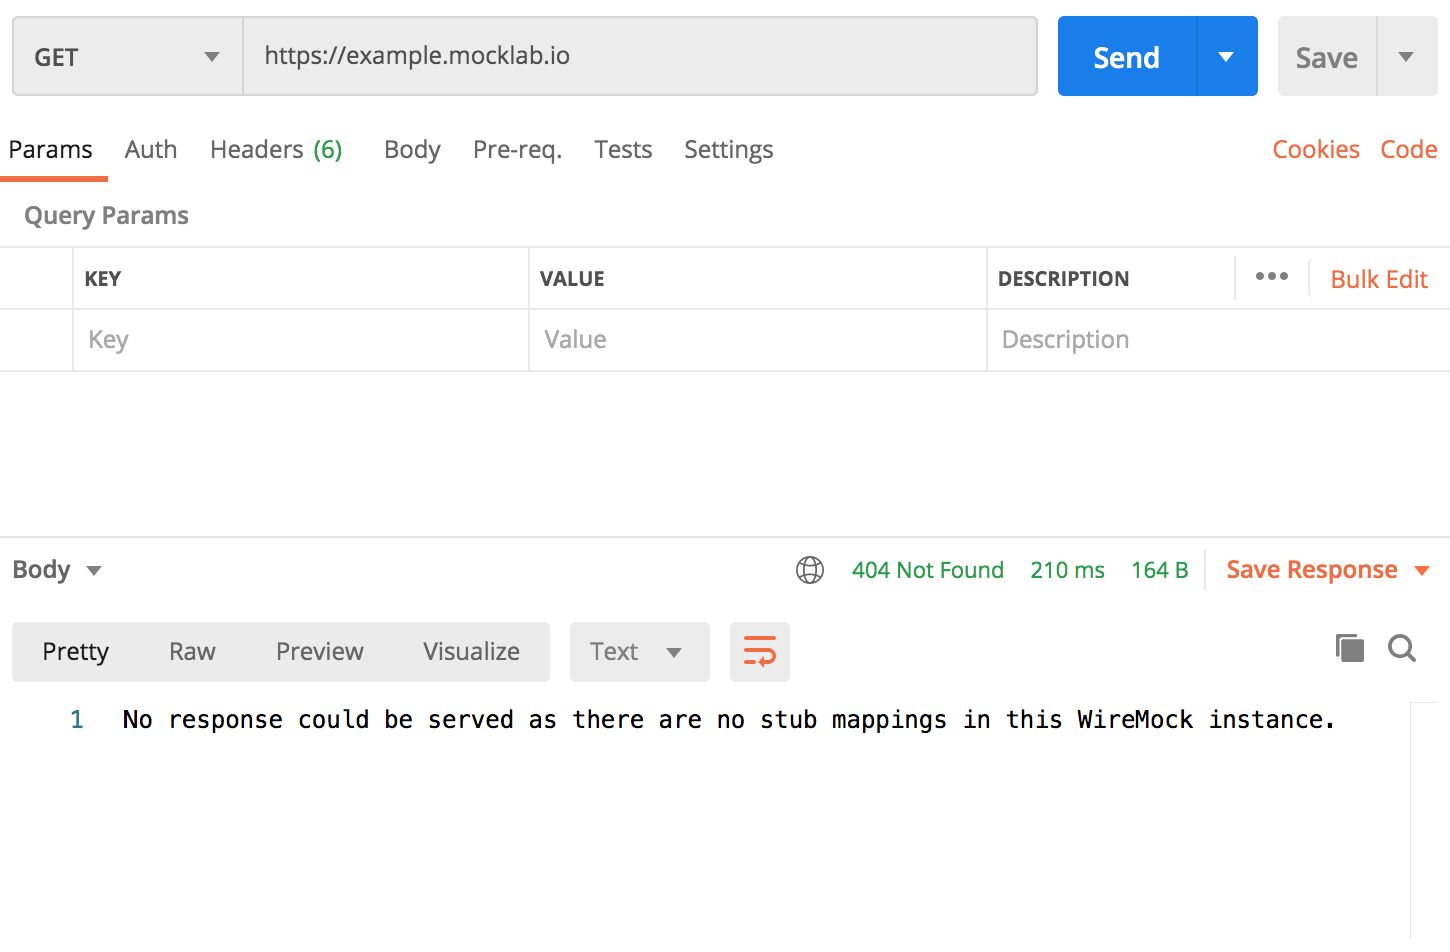
Basic contact list
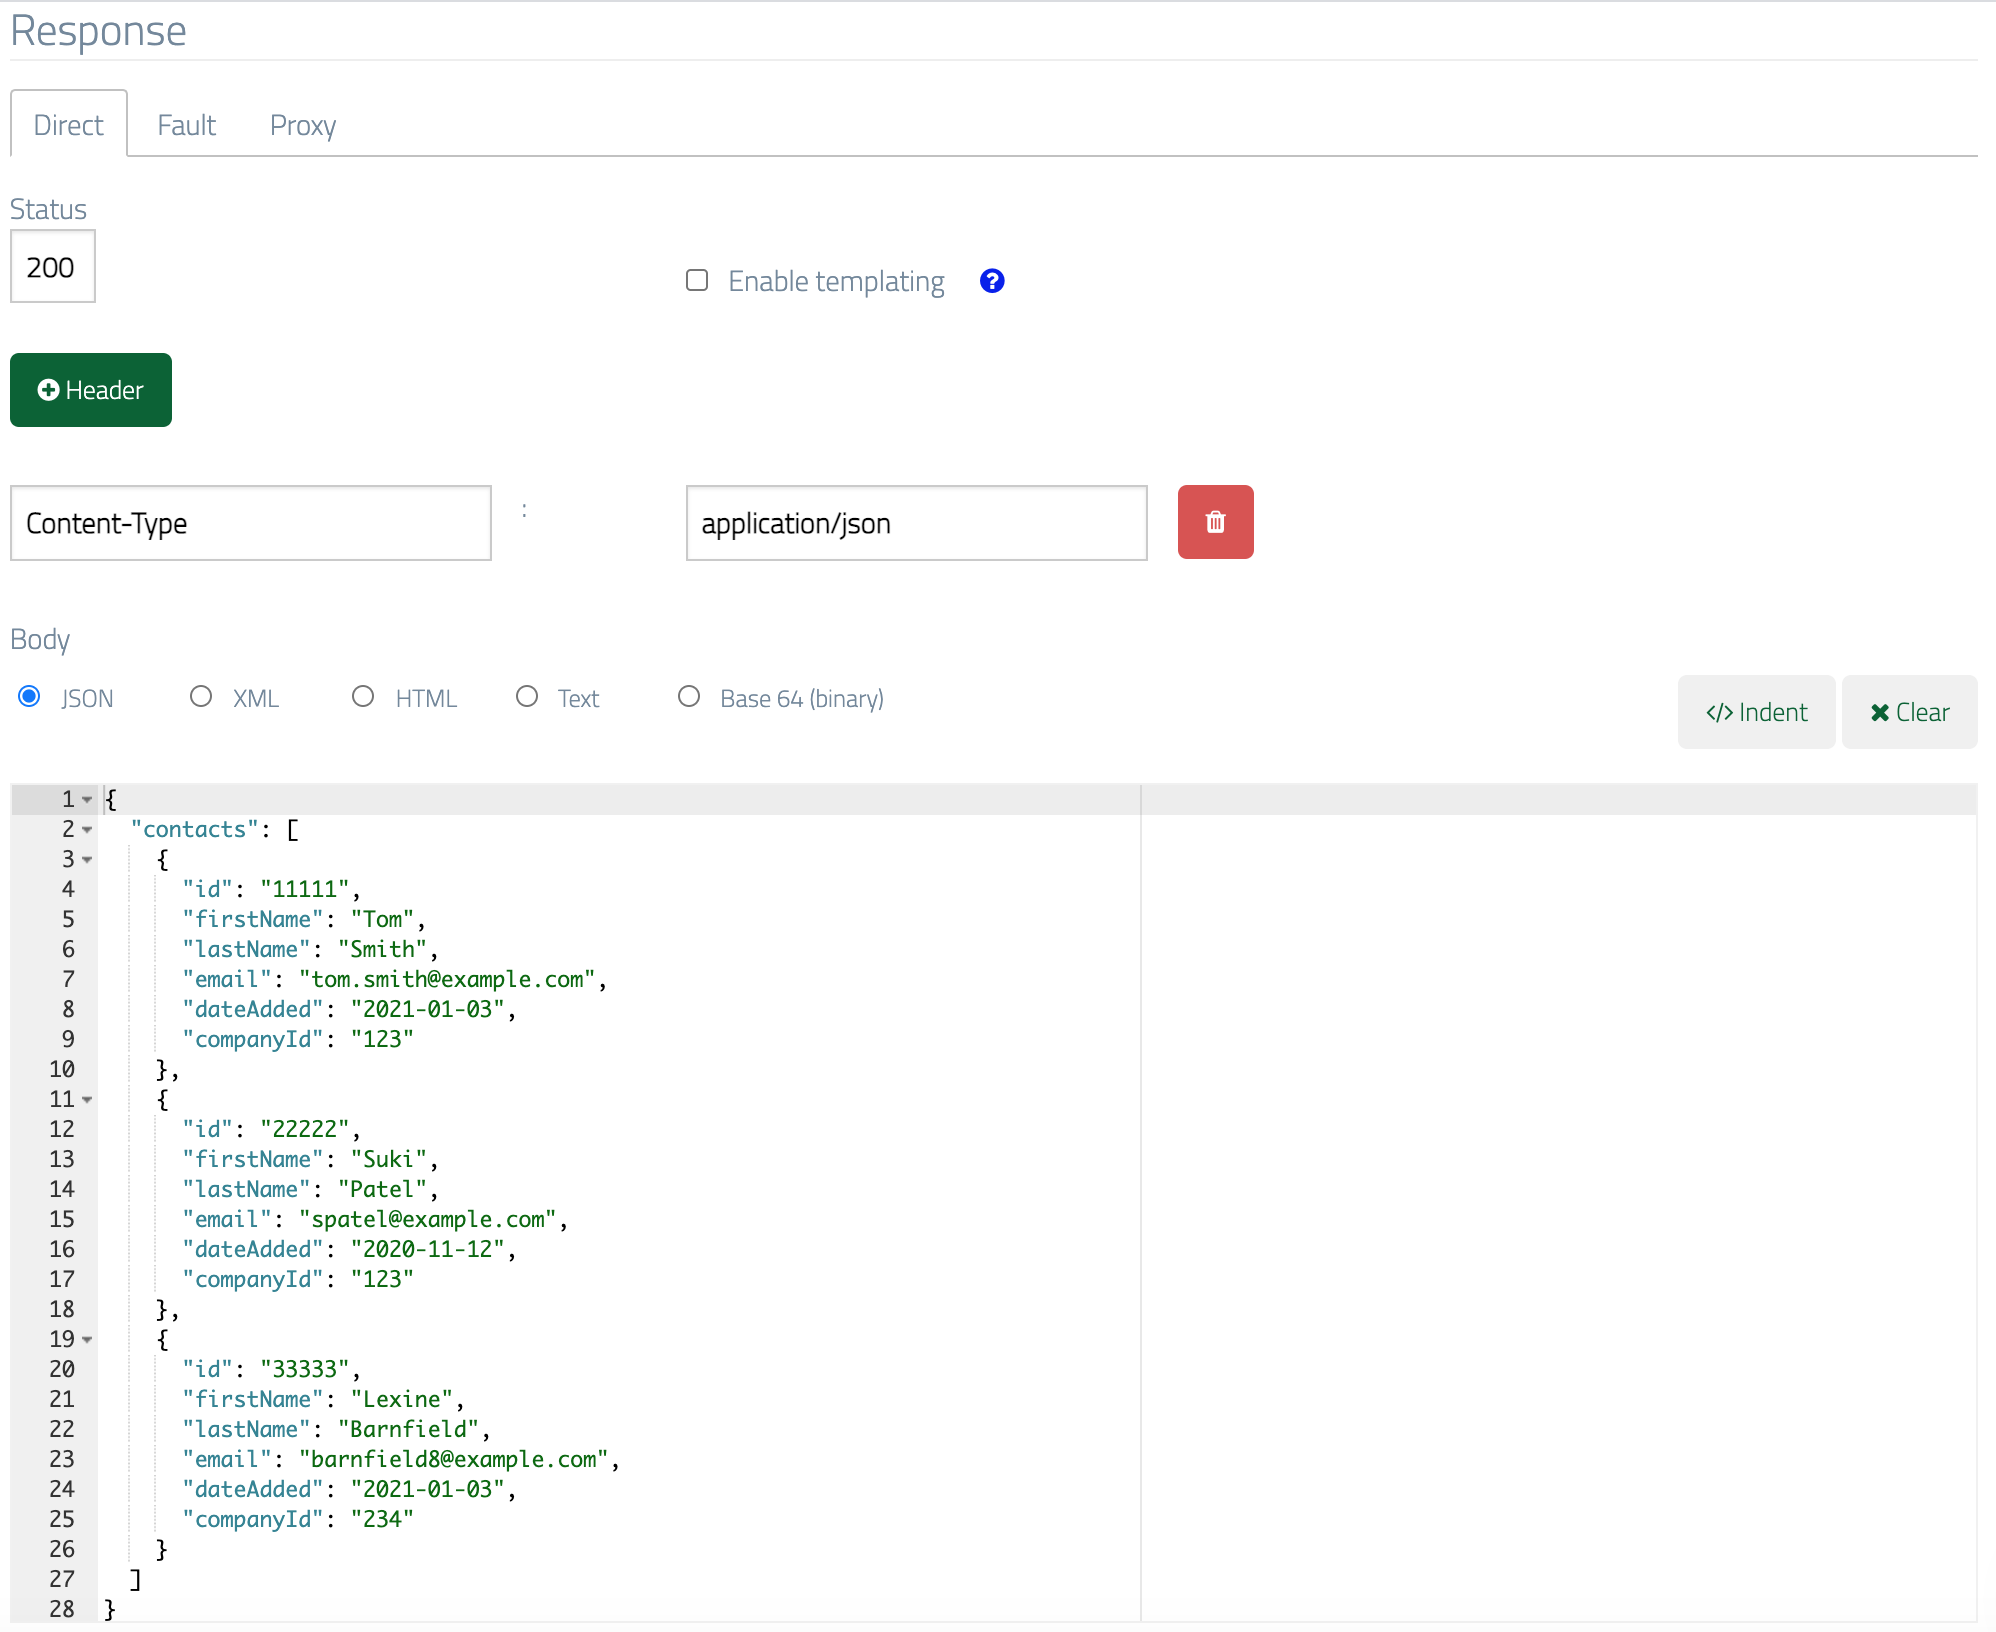
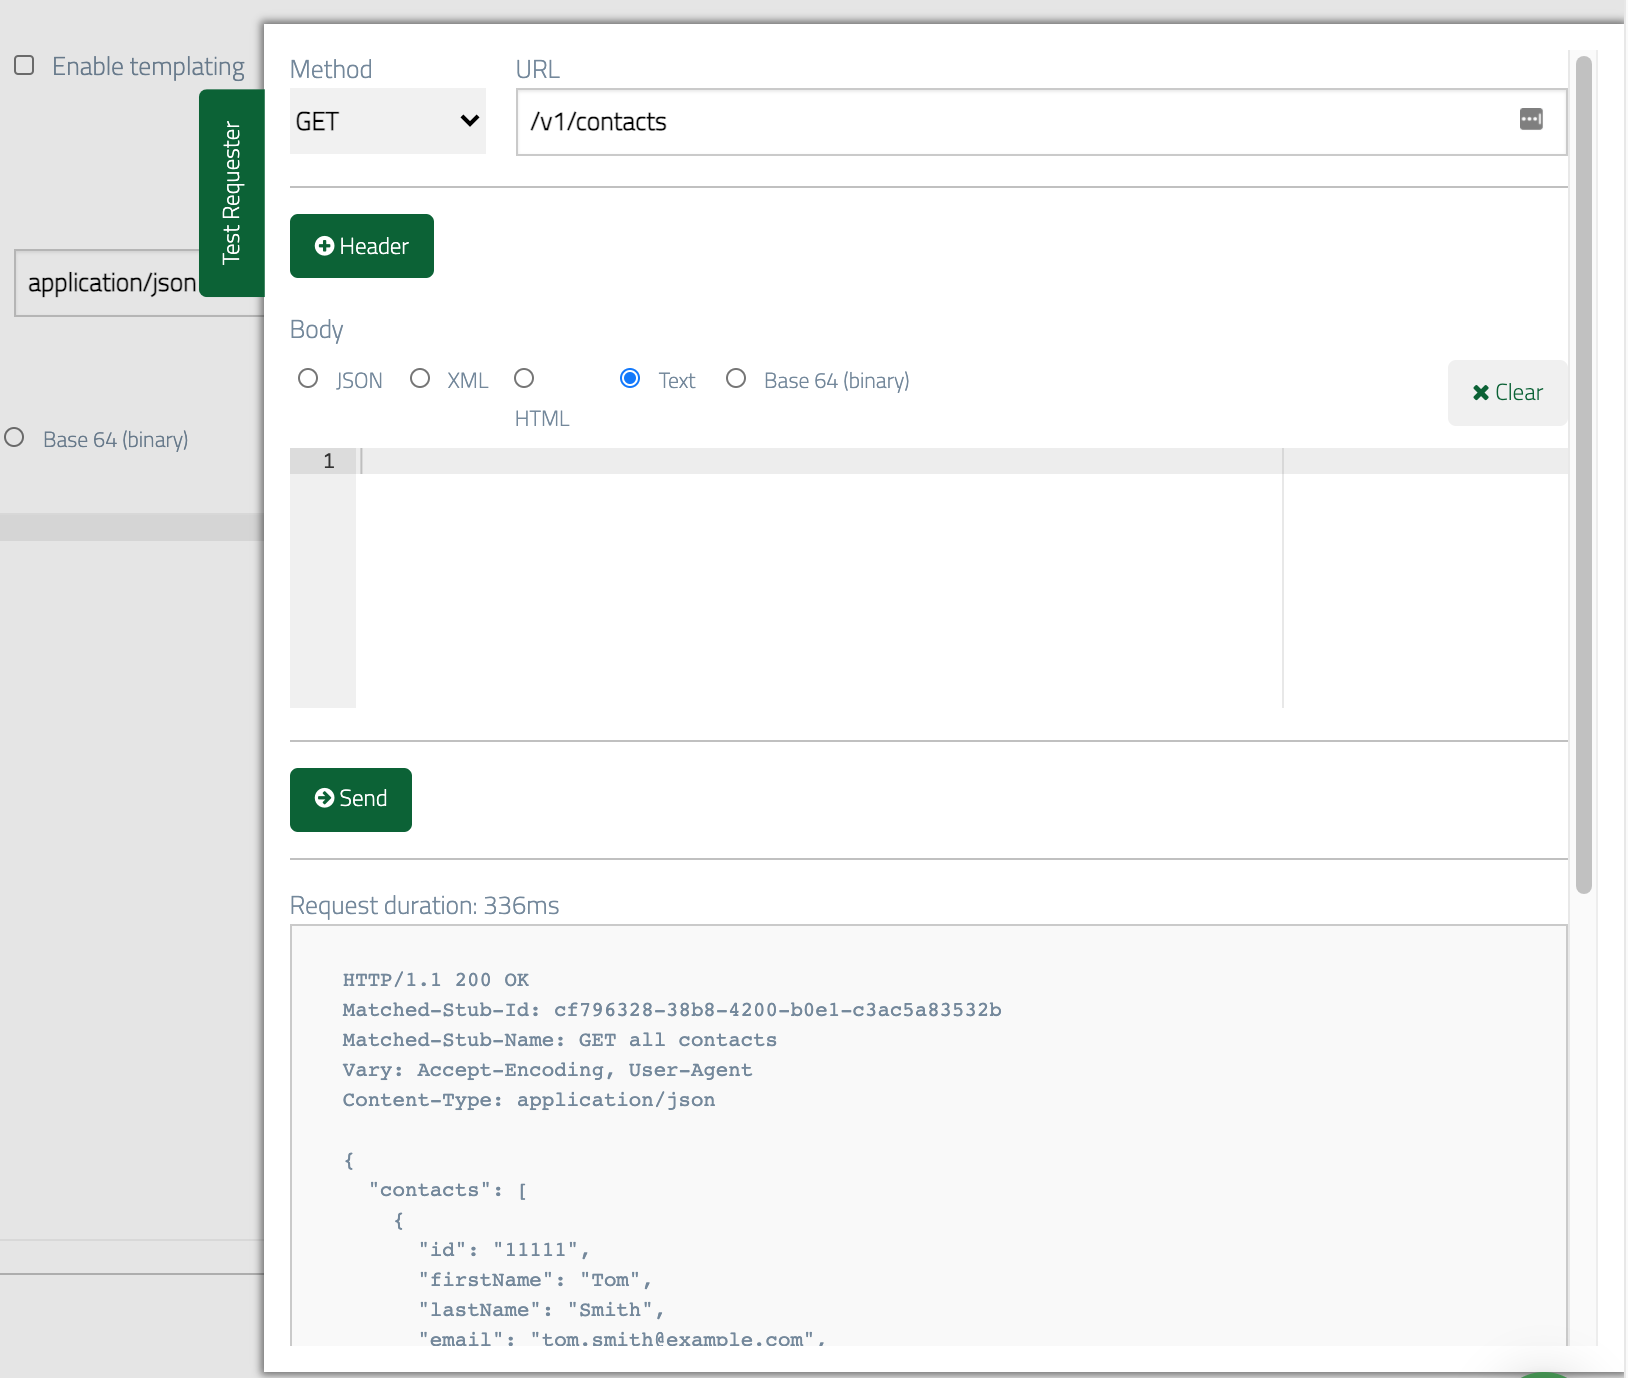
A contact manager application is likely to have the ability to list all stored contacts. Let’s assume our imaginary API responds toGET /v1/contacts with JSON like:
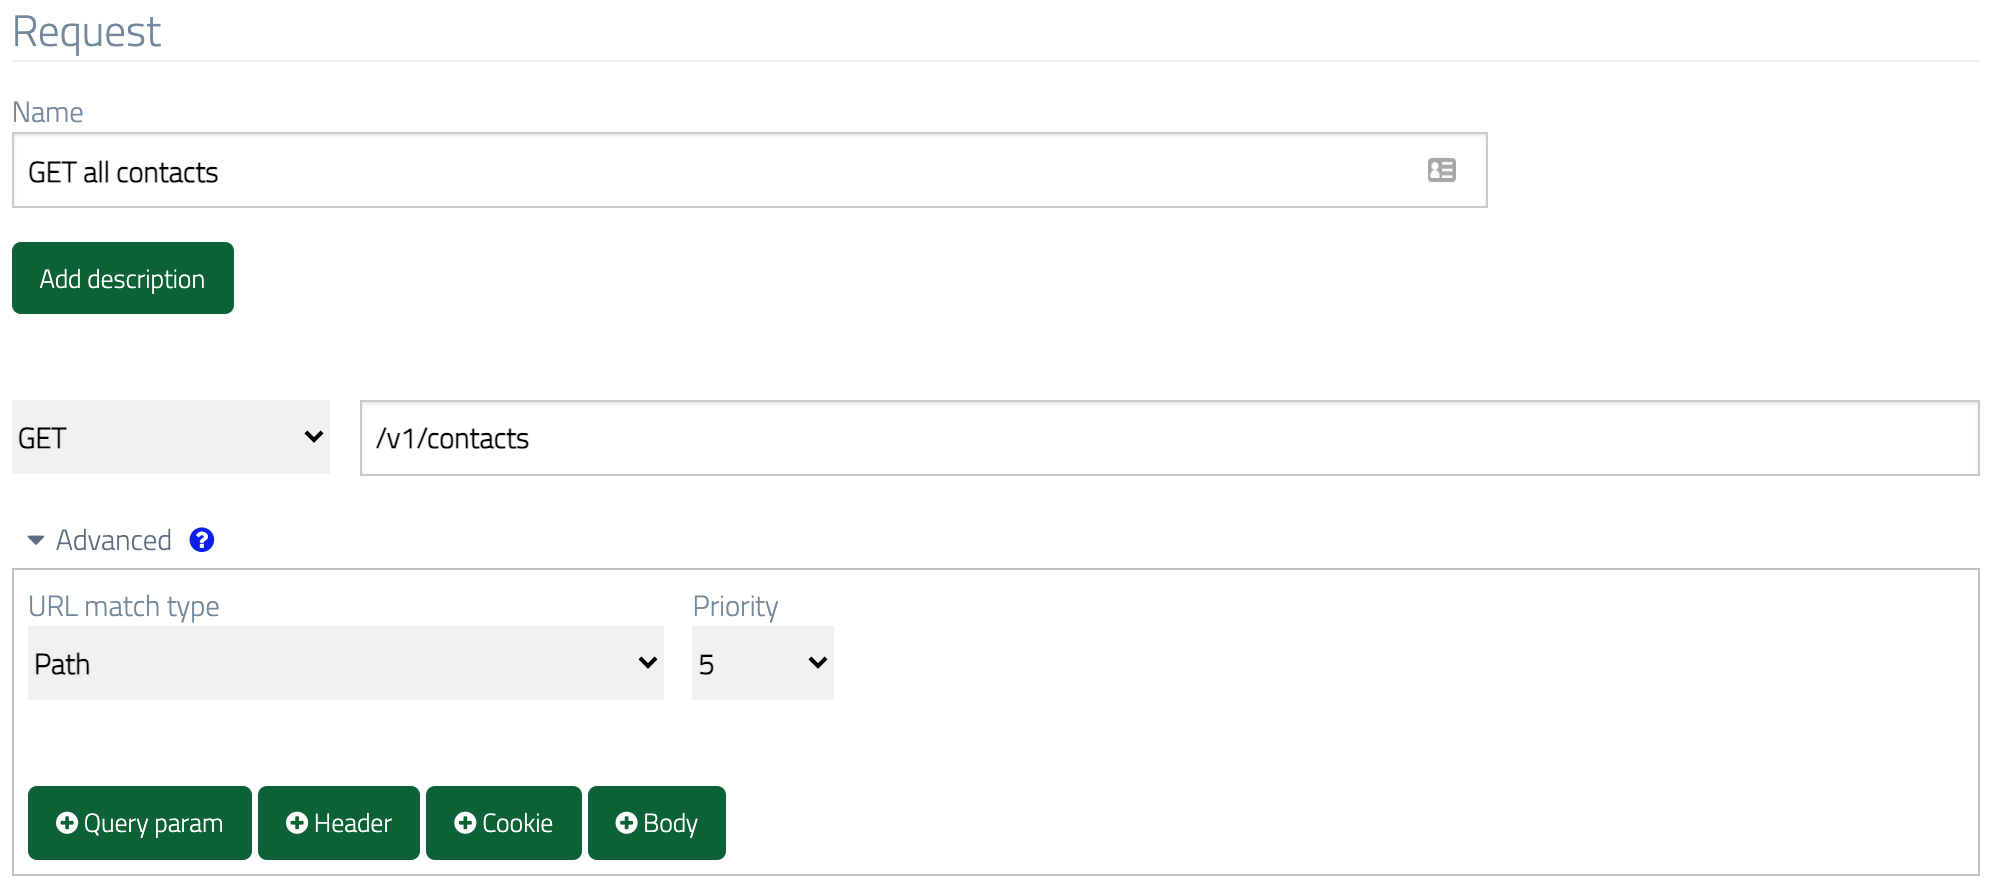
GET with the exact
URL path /v1/contacts. Go to the Stubs page under your new mock API and hit the
new stub button:
 .
Then in the request section, set the method to
.
Then in the request section, set the method to GET, the URL to /v1/contacts
and the URL match type to Path:
Content-Type: application/json header:
Filtering via query parameters
REST APIs often allow collection resources like the contact list to be filtered using parameters in the request’s query string. For instance, so that we can find contacts for a specific company our contact manager might support filtering by company ID. For instance/v1/contacts?companyId=123
would return:
companyId equalling 123:
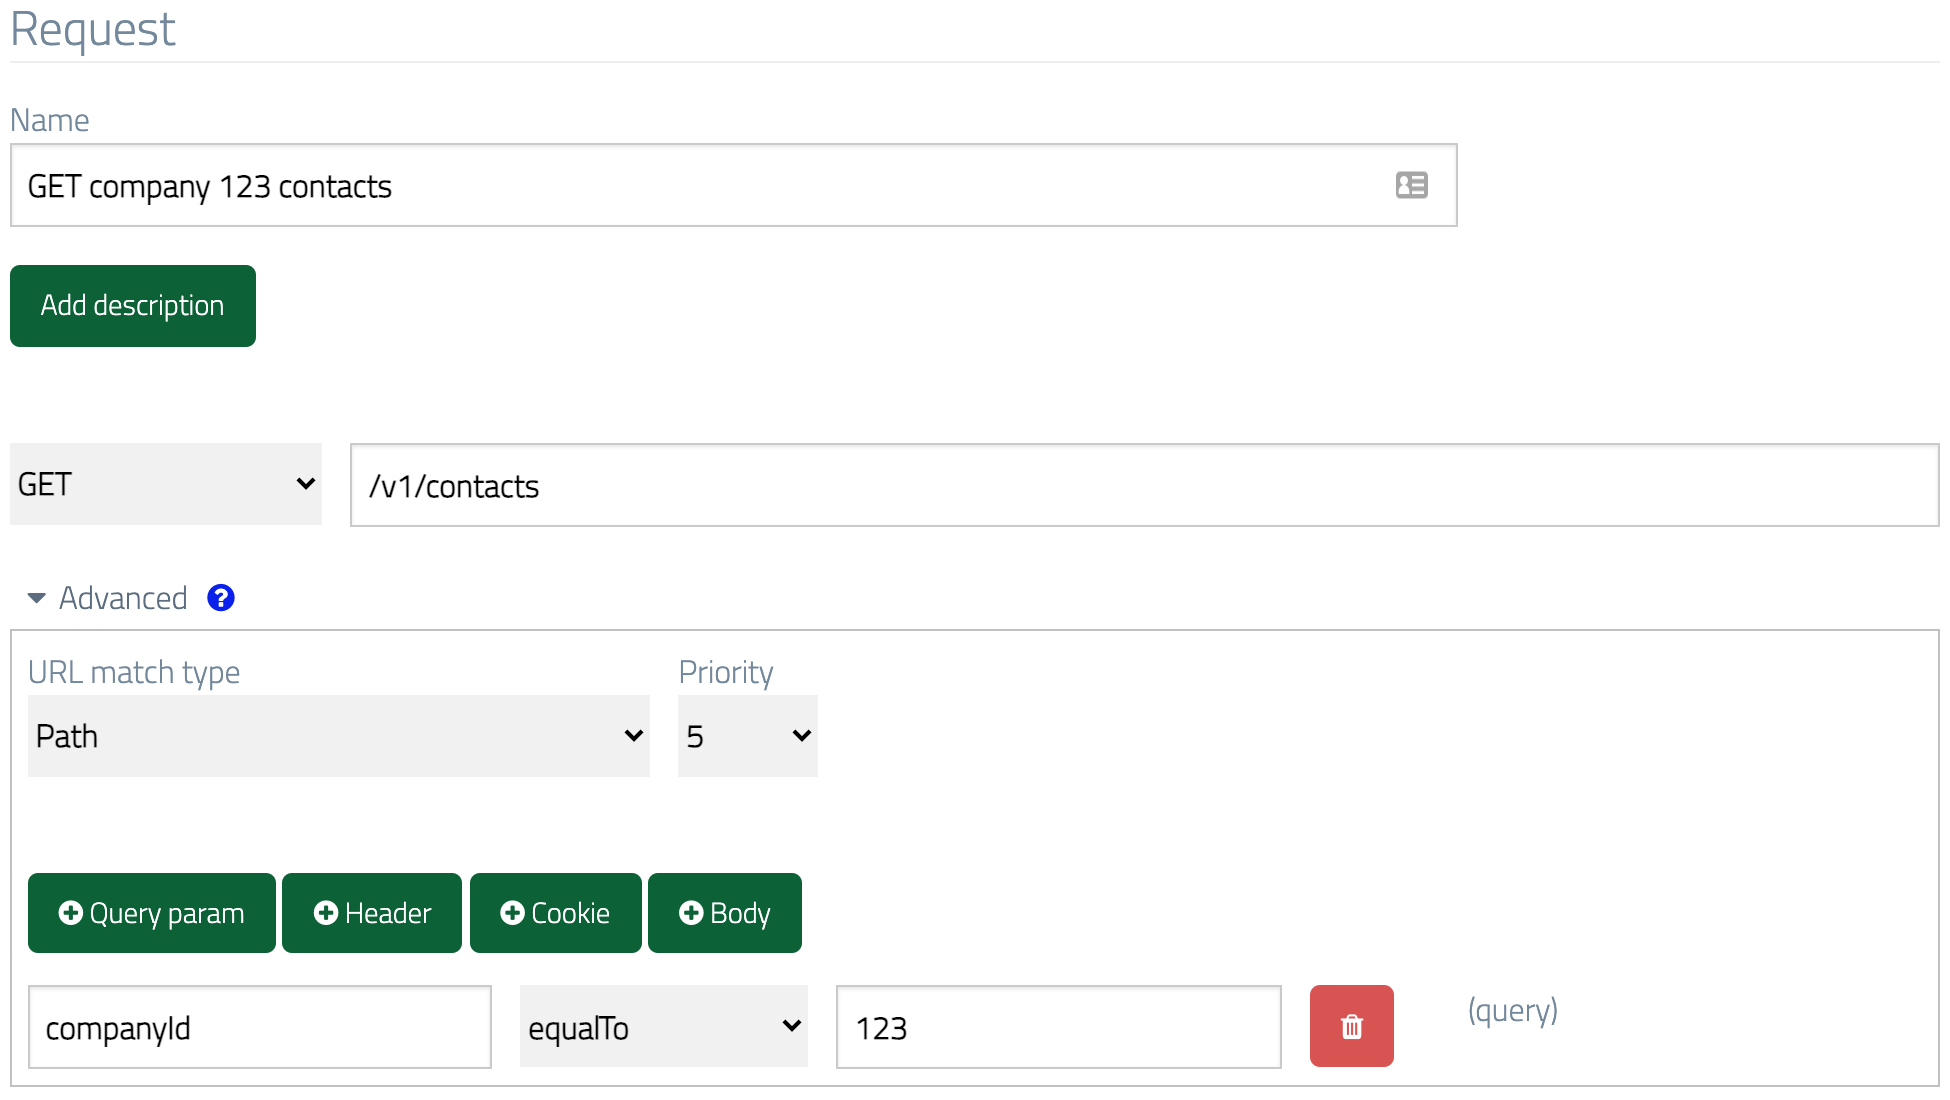

equalTo and contains).
Getting an individual contact
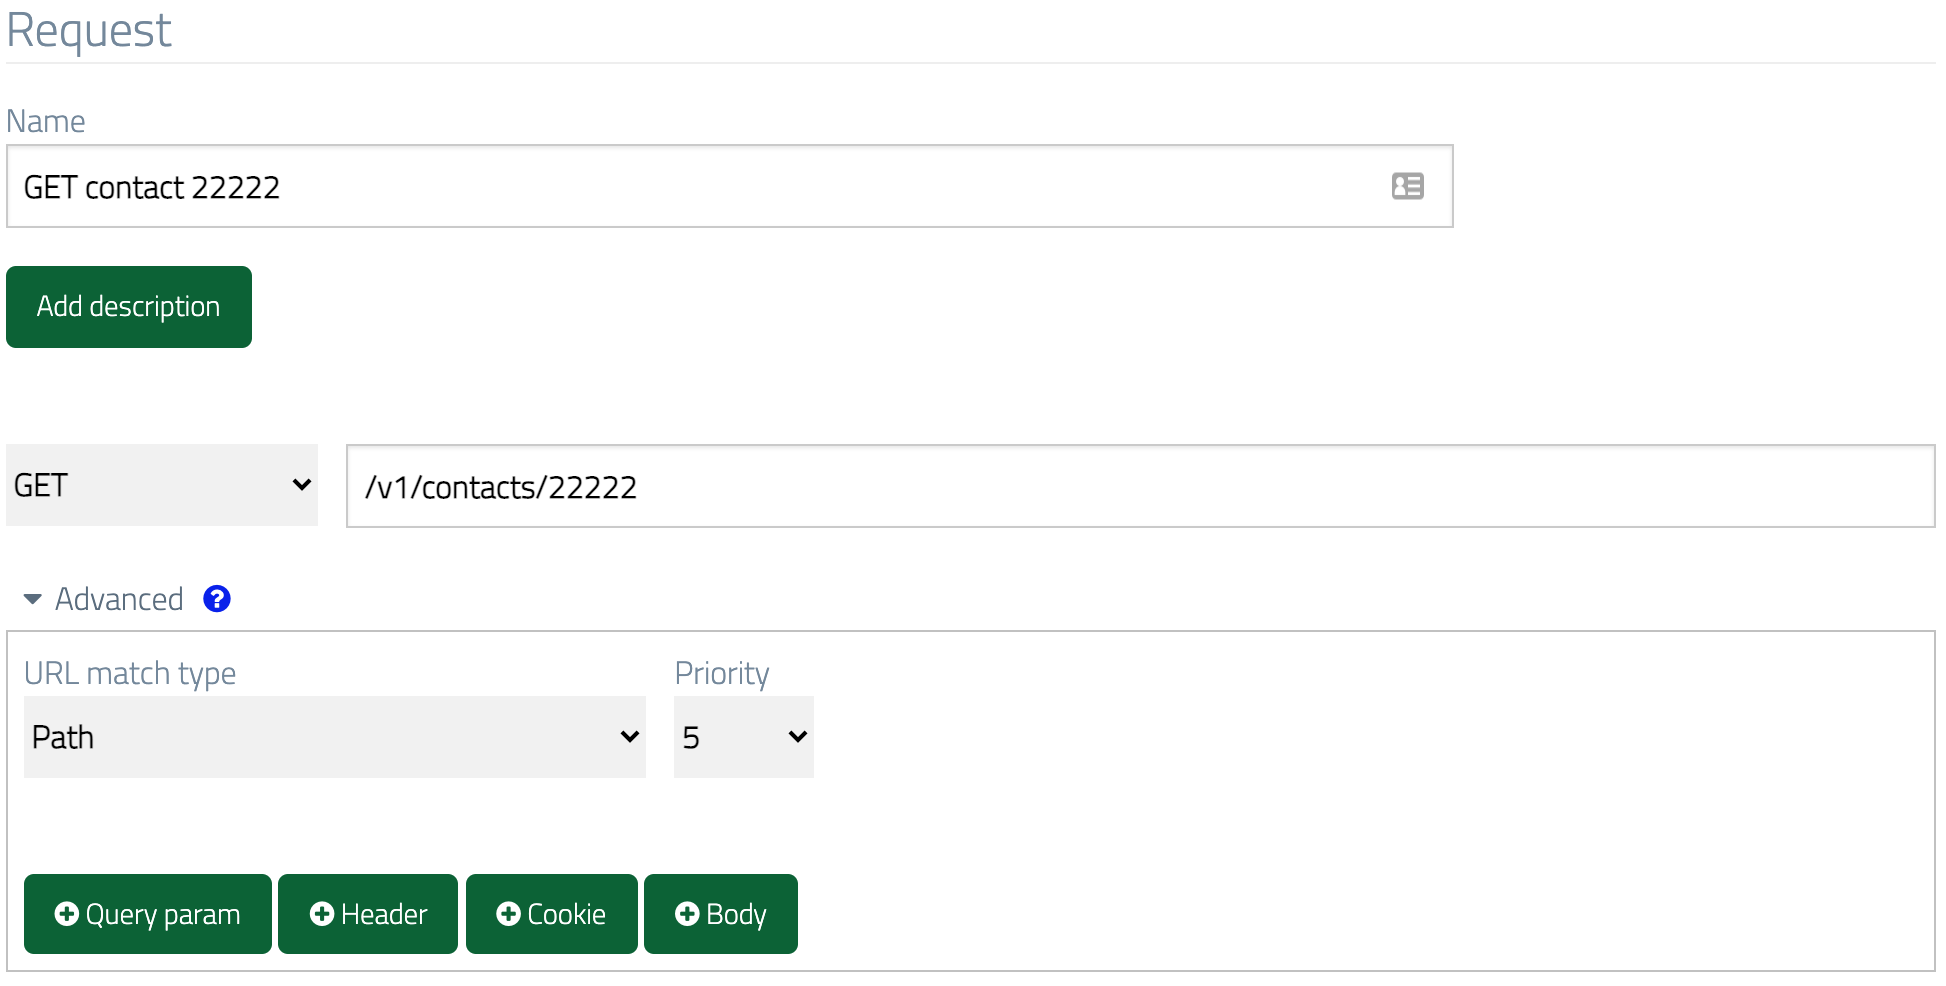
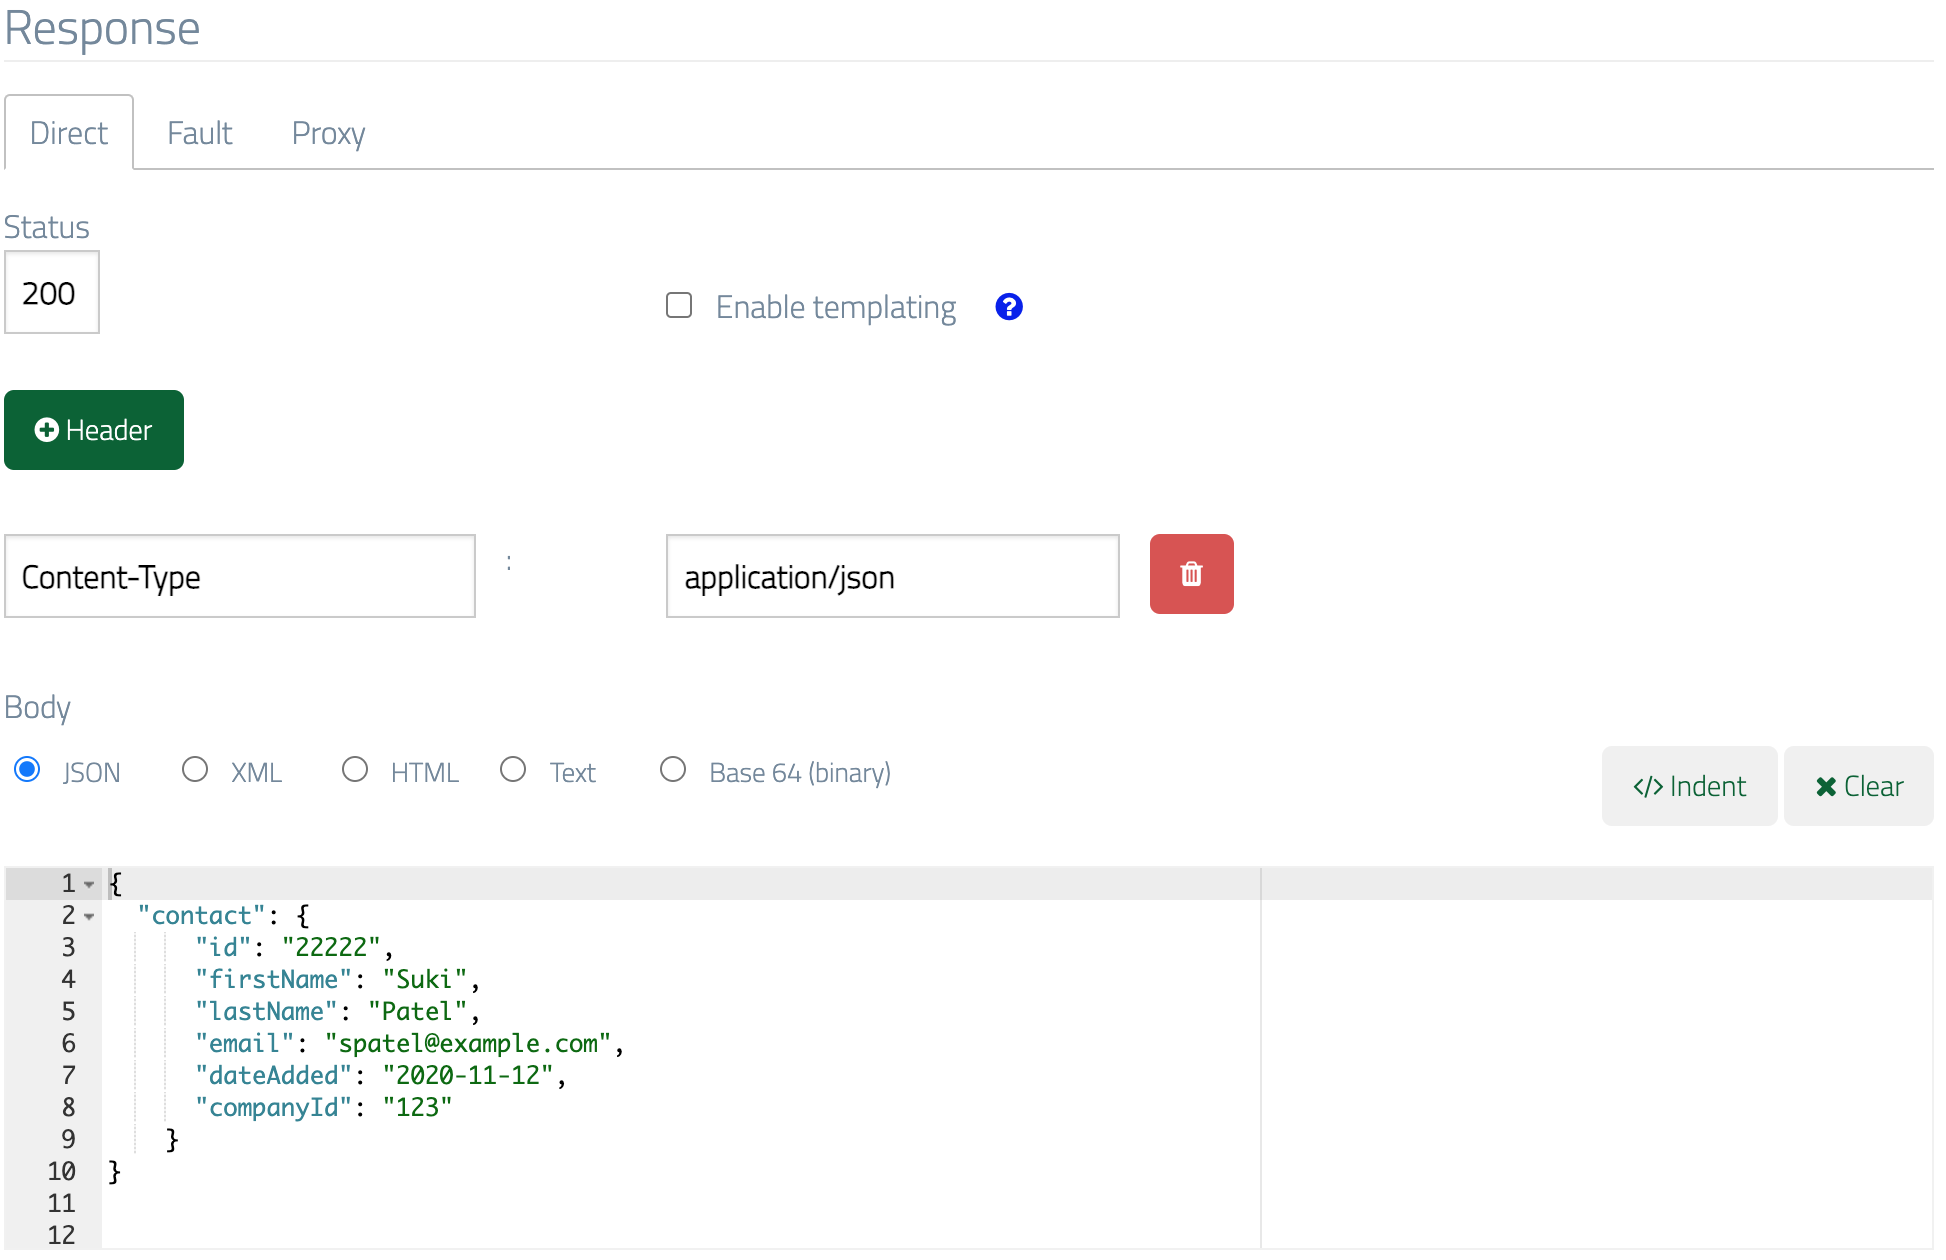
It’s also very common for REST APIs to support retrieval of individual items of data specified by an identifier in the URL path, so in our case we might fetch an individual contact via aGET to /v1/contacts/22222.
We can stub a single data item in a very similar manner to the contact list we
created first, relying on exact URL path equality to match the request:
Using URL regex matching and response templating to simulate many data records
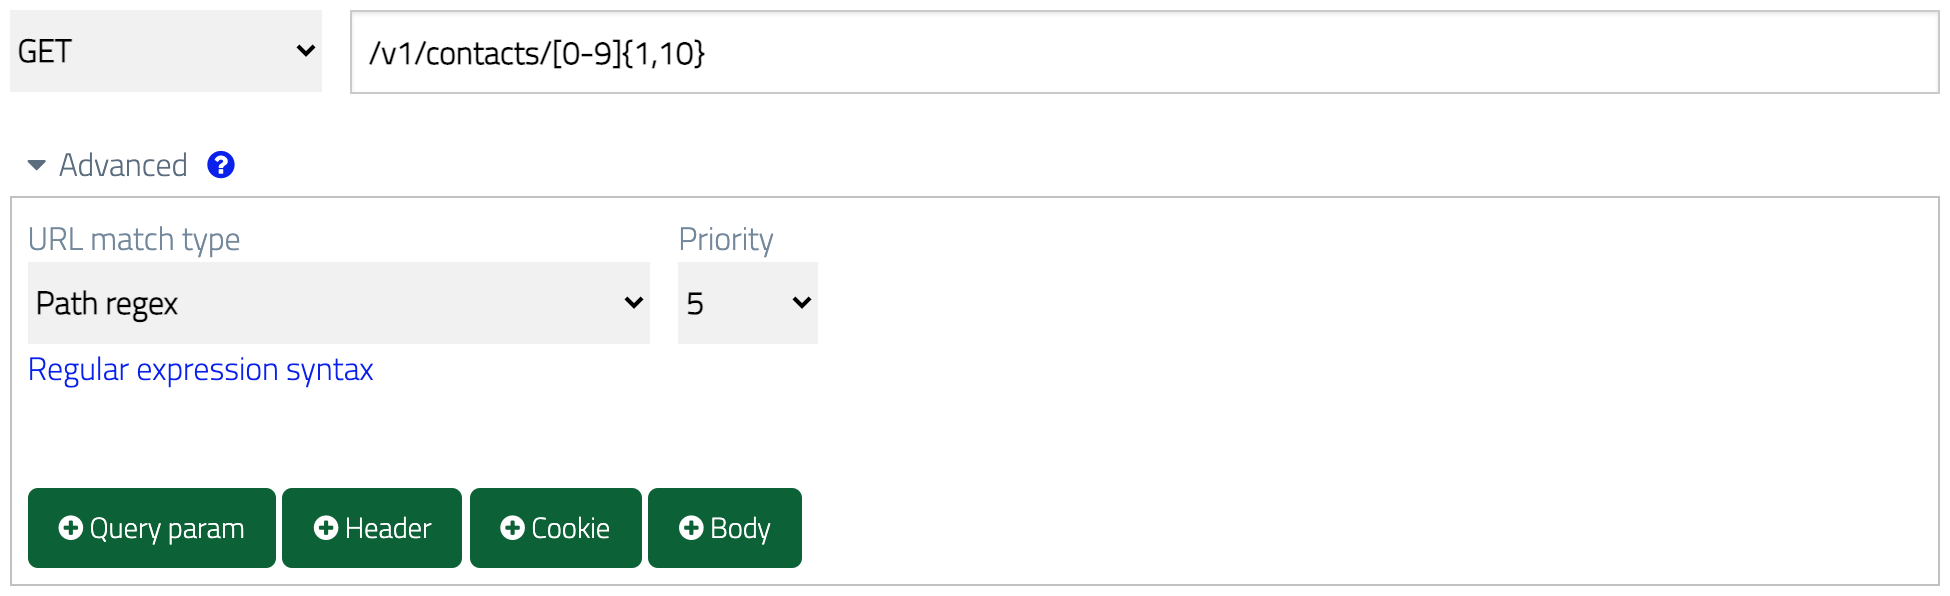
If you only need to be able to return a small number of individual contacts then the above approach of creating a stub per contact will work OK. However, you may need return many unique contact records e.g. because you’re performance testing and want to spread the load across realistic data volumes. In this instance you can use URL regex matching and response templating to simulate the presence of many data items. Let’s modify the single contact stub we’ve already created. First we’ll switch to a looser URL match using thePath regex URL match type with the regular expression /v1/contacts/[0-9]{1,10} as the value.
This will match any URL path starting with /v1/contacts and ending with any
numeric ID between 1 and 10 characters long:
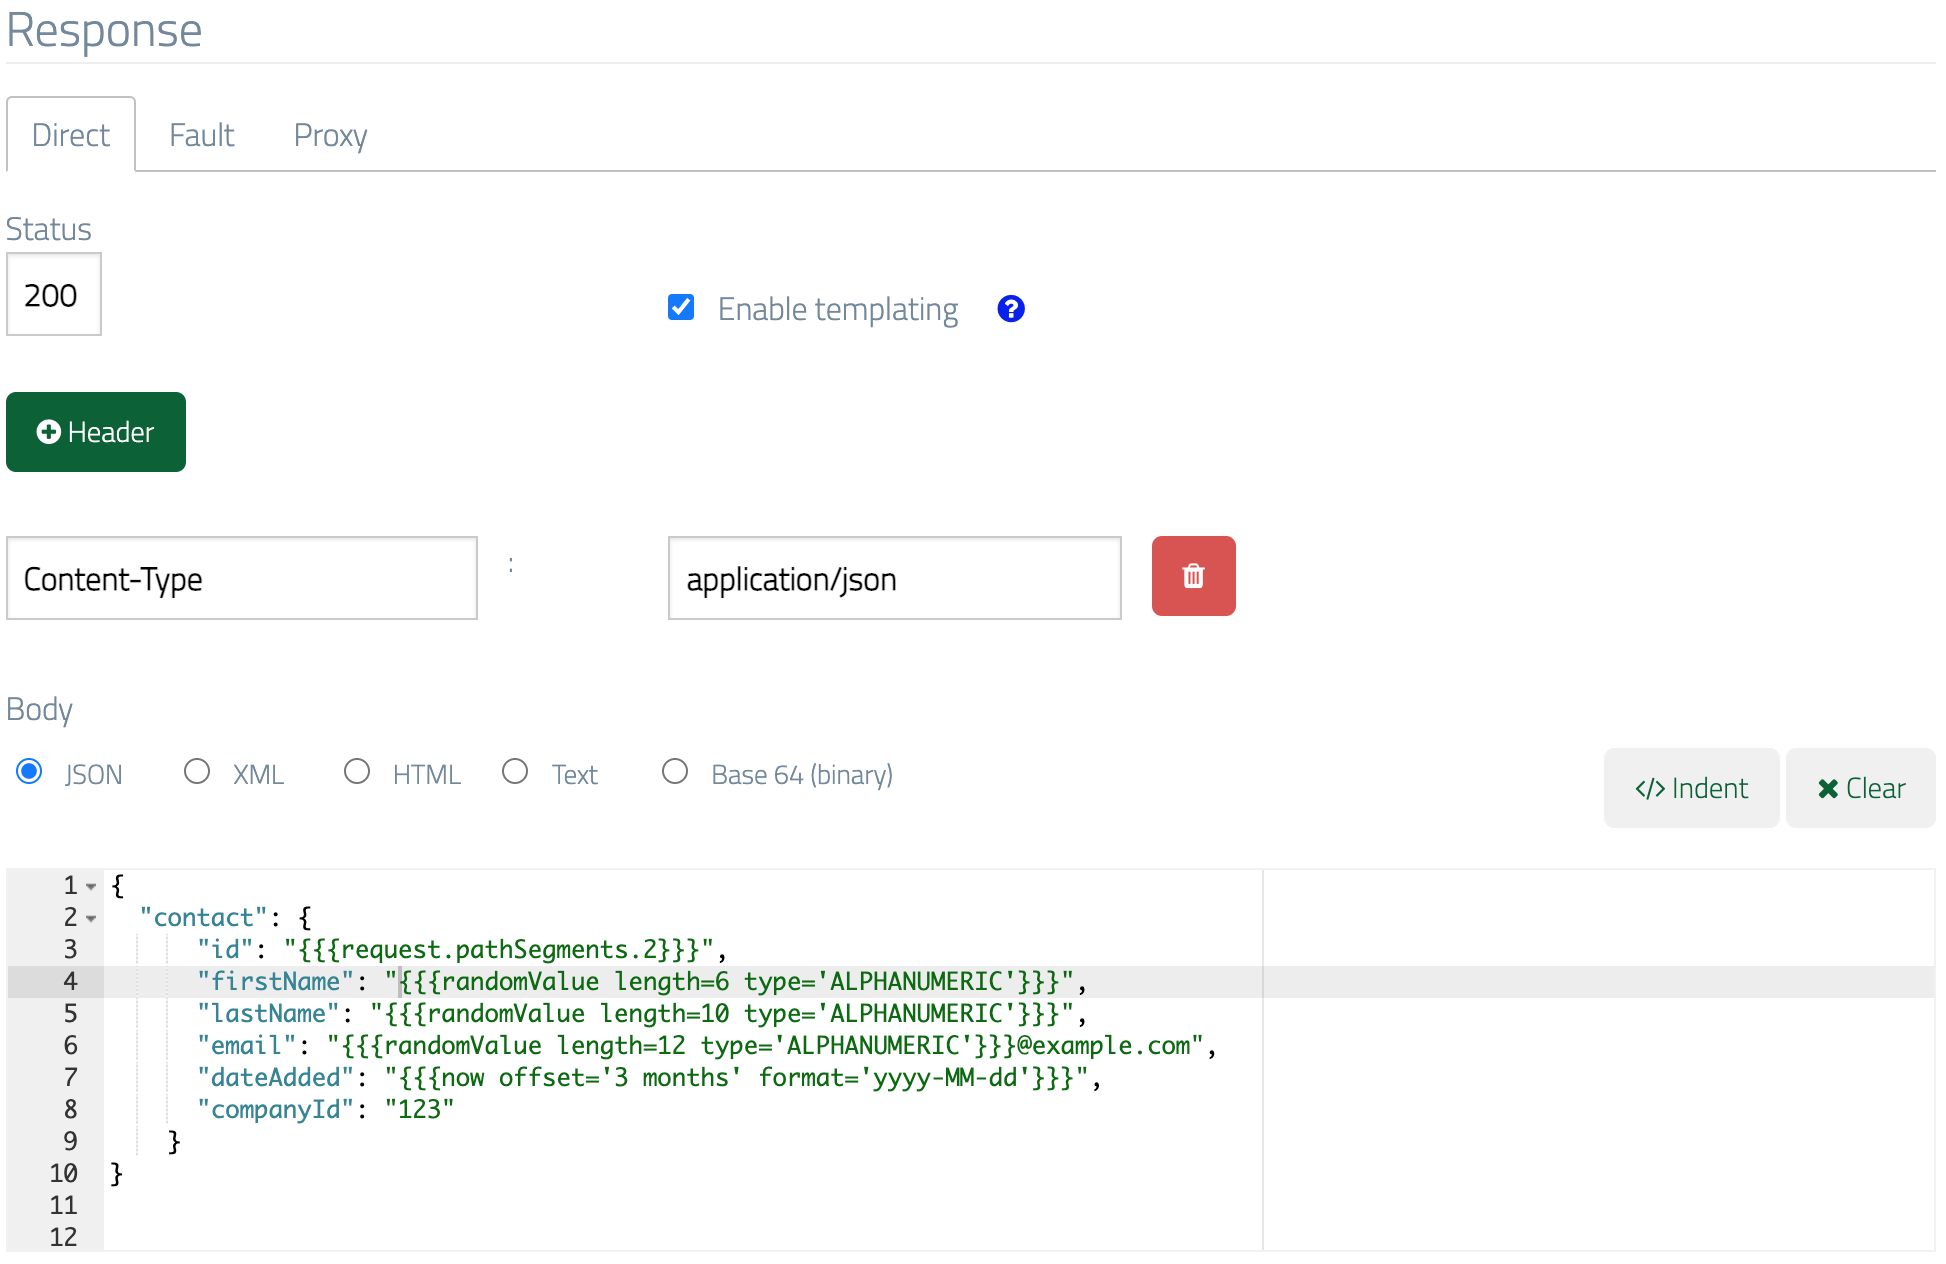
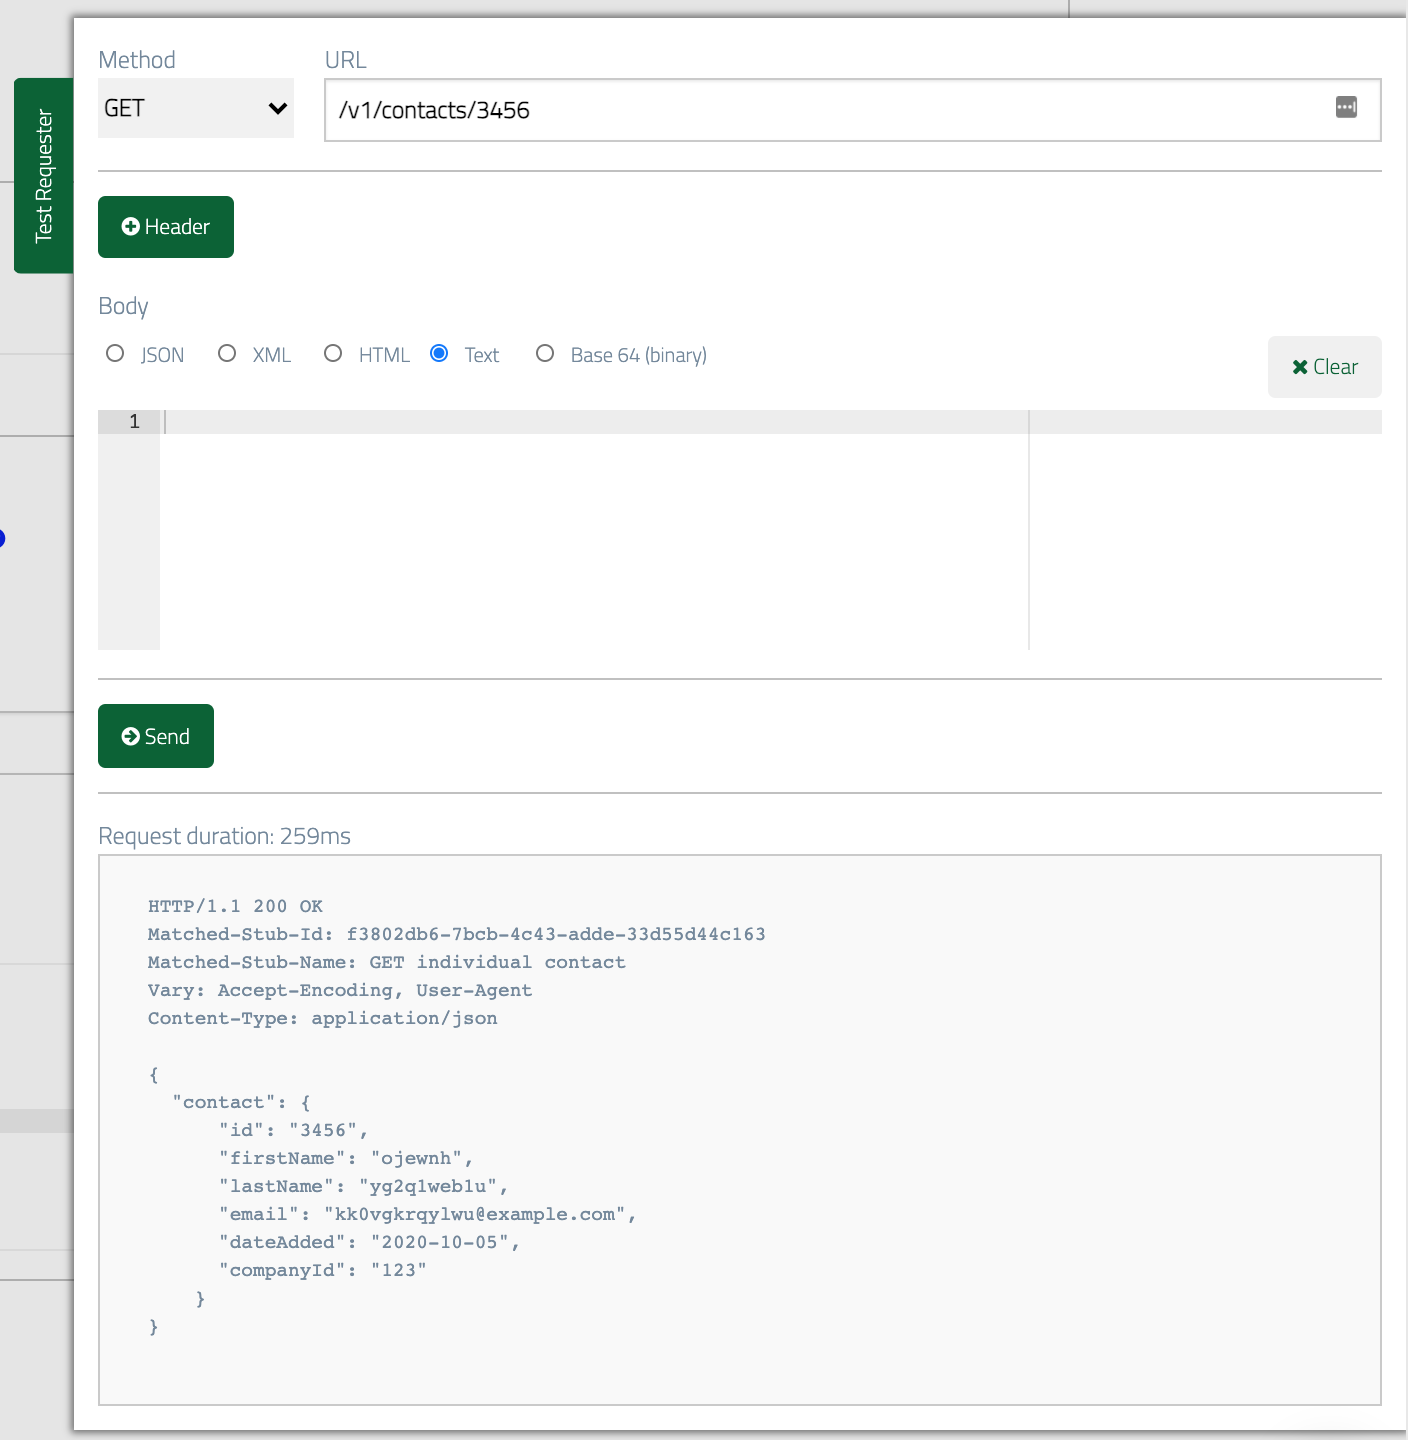
idis now set from the 3rd segment of the incoming request URL’s path, so it will always be the same as the requested contact ID.firstName,lastNameandemailare now random alphanumeric text (with a fixed domain name in the case ofemail).dateAddedis set to 3 months before today’s date.
Creating a new contact
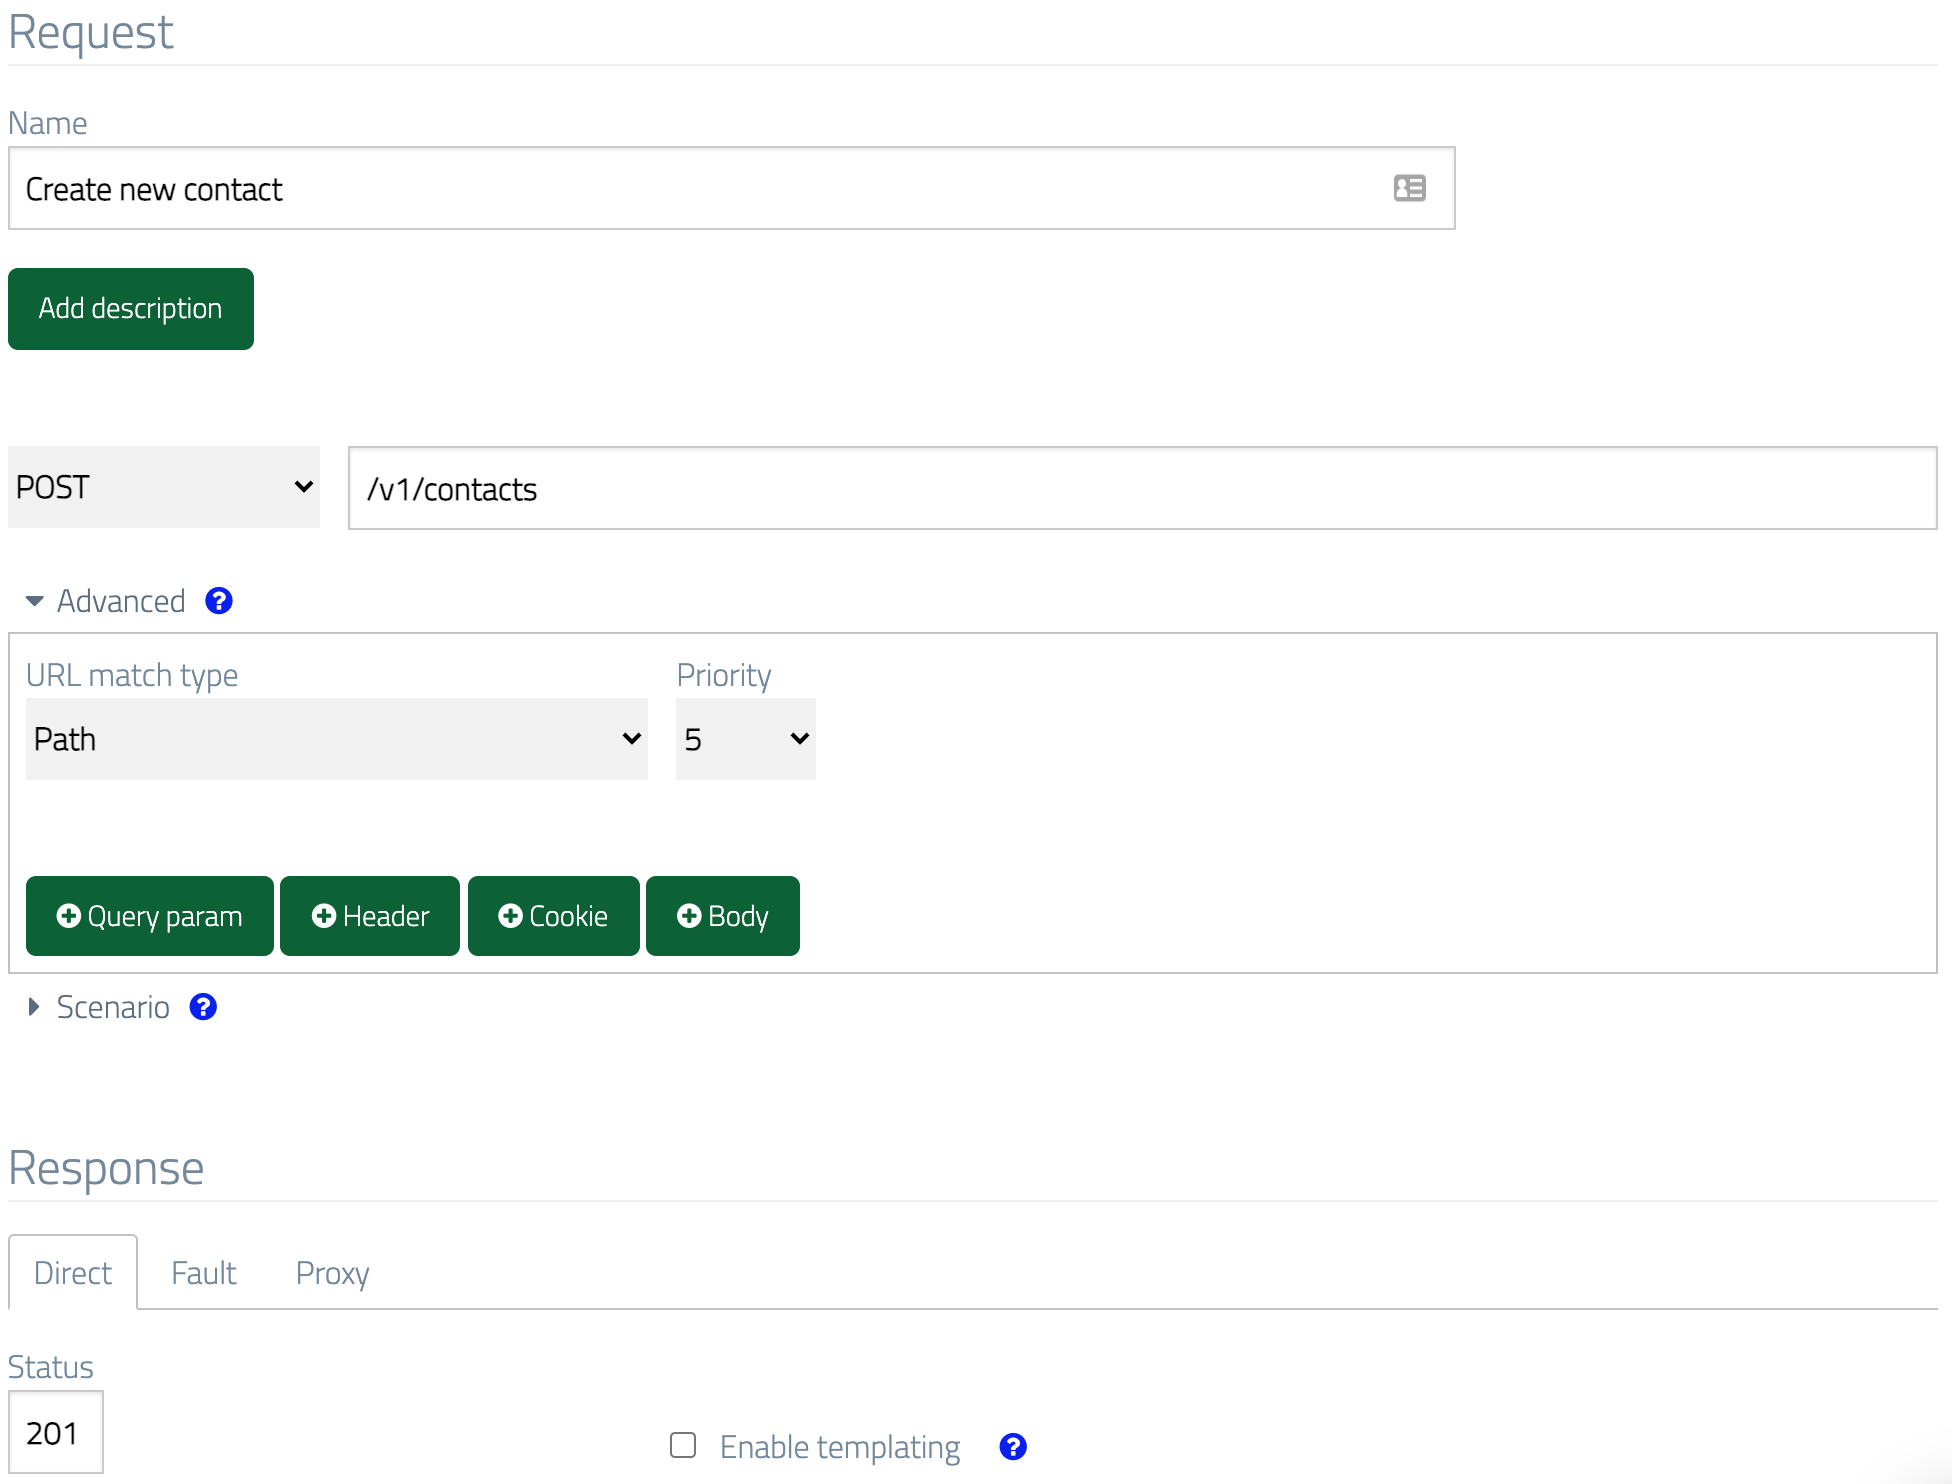
At some point our contact manager API will need to be able to accept new contacts in addition to just returning them. Commonly, REST APIs support sending aPOST
request to the URL for a collection resource as a means to add new data items.
So our contact manager might accept POST /v1/contacts, returning a
response with status code 201 Created and an empty body:
More specific matching
In its current state, this stub will be matched regardless of the contents of the request body, so a body with incorrectly structured JSON, XML or even no body at all will still yield the201 response.
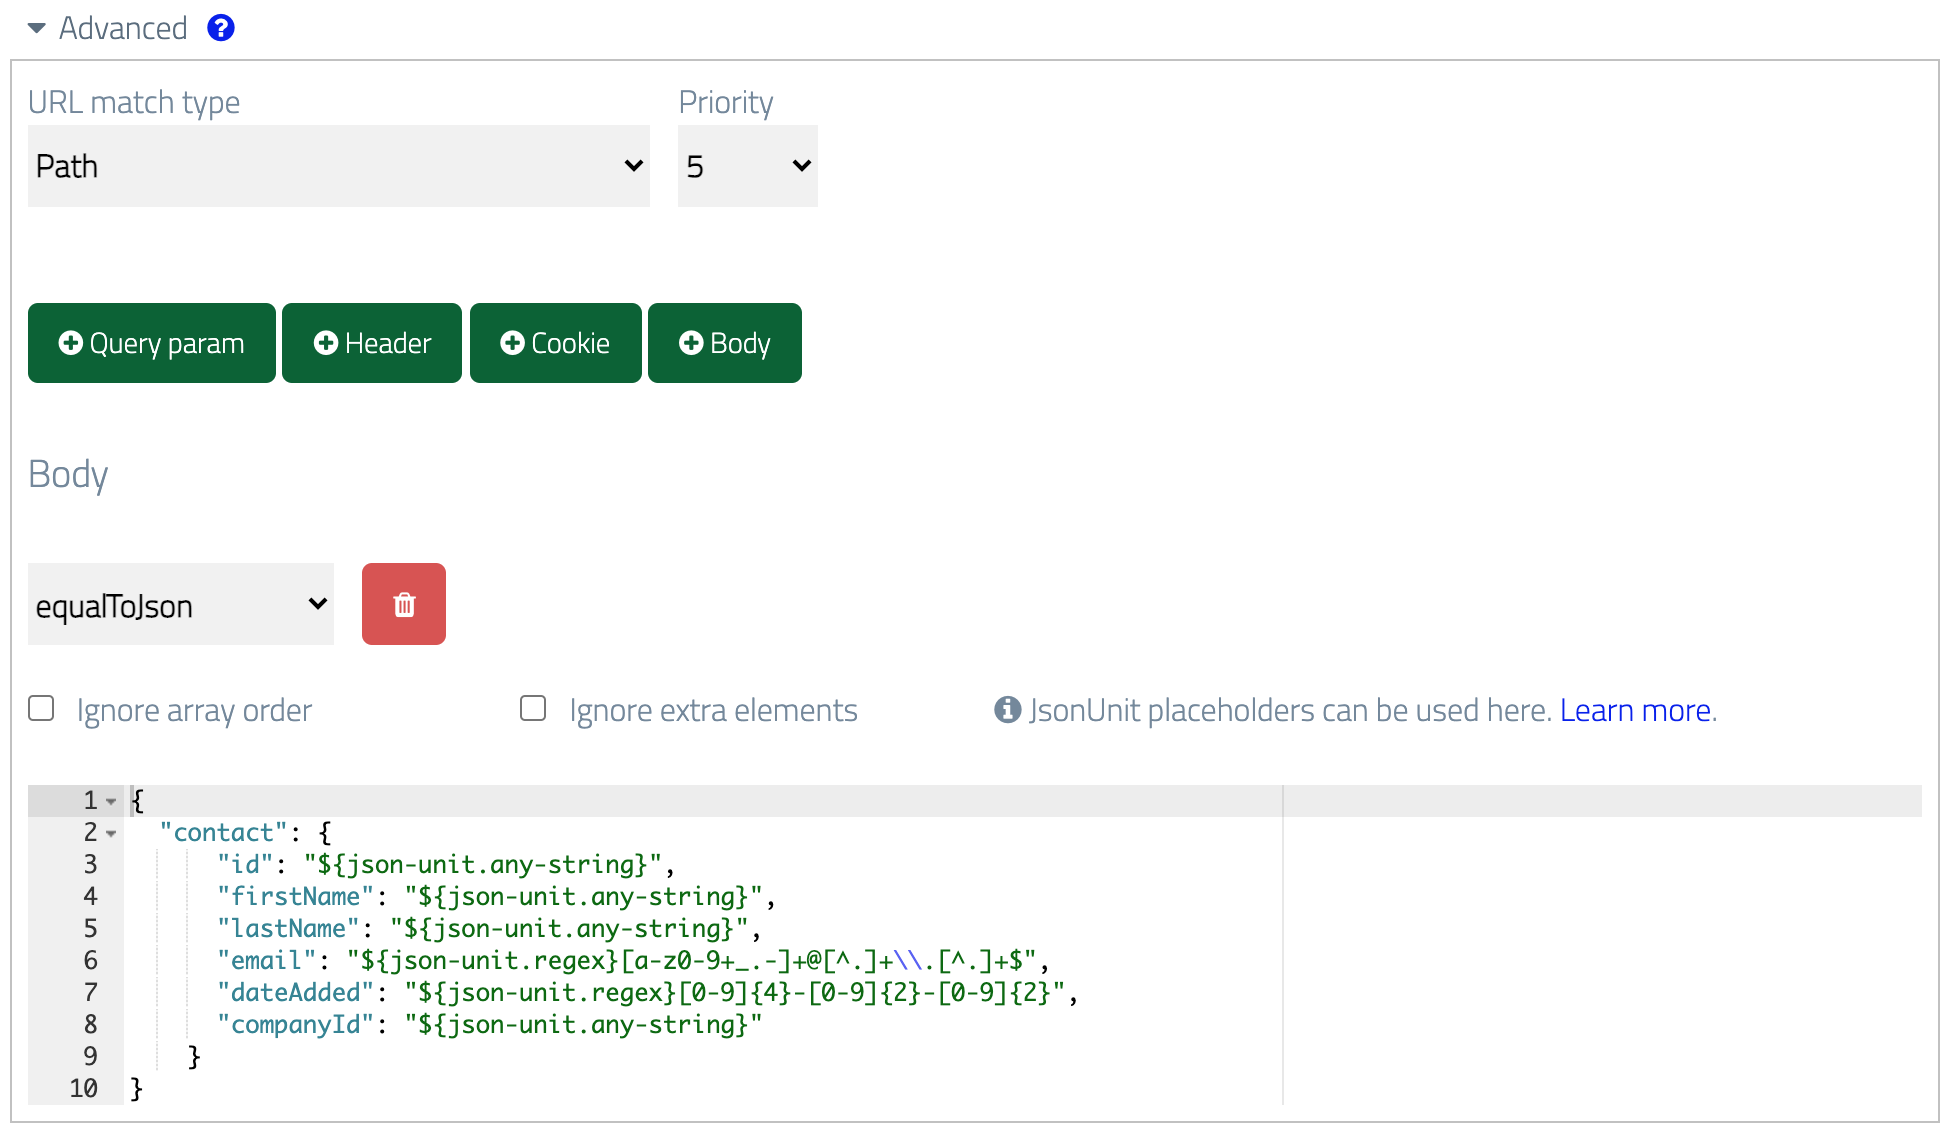
If we want to ensure the stub is only matched when correctly structured JSON is
sent in the request but without requiring a set of exact values, we can add a body
matcher by clicking New body matcher and using JSONUnit as wildcards:
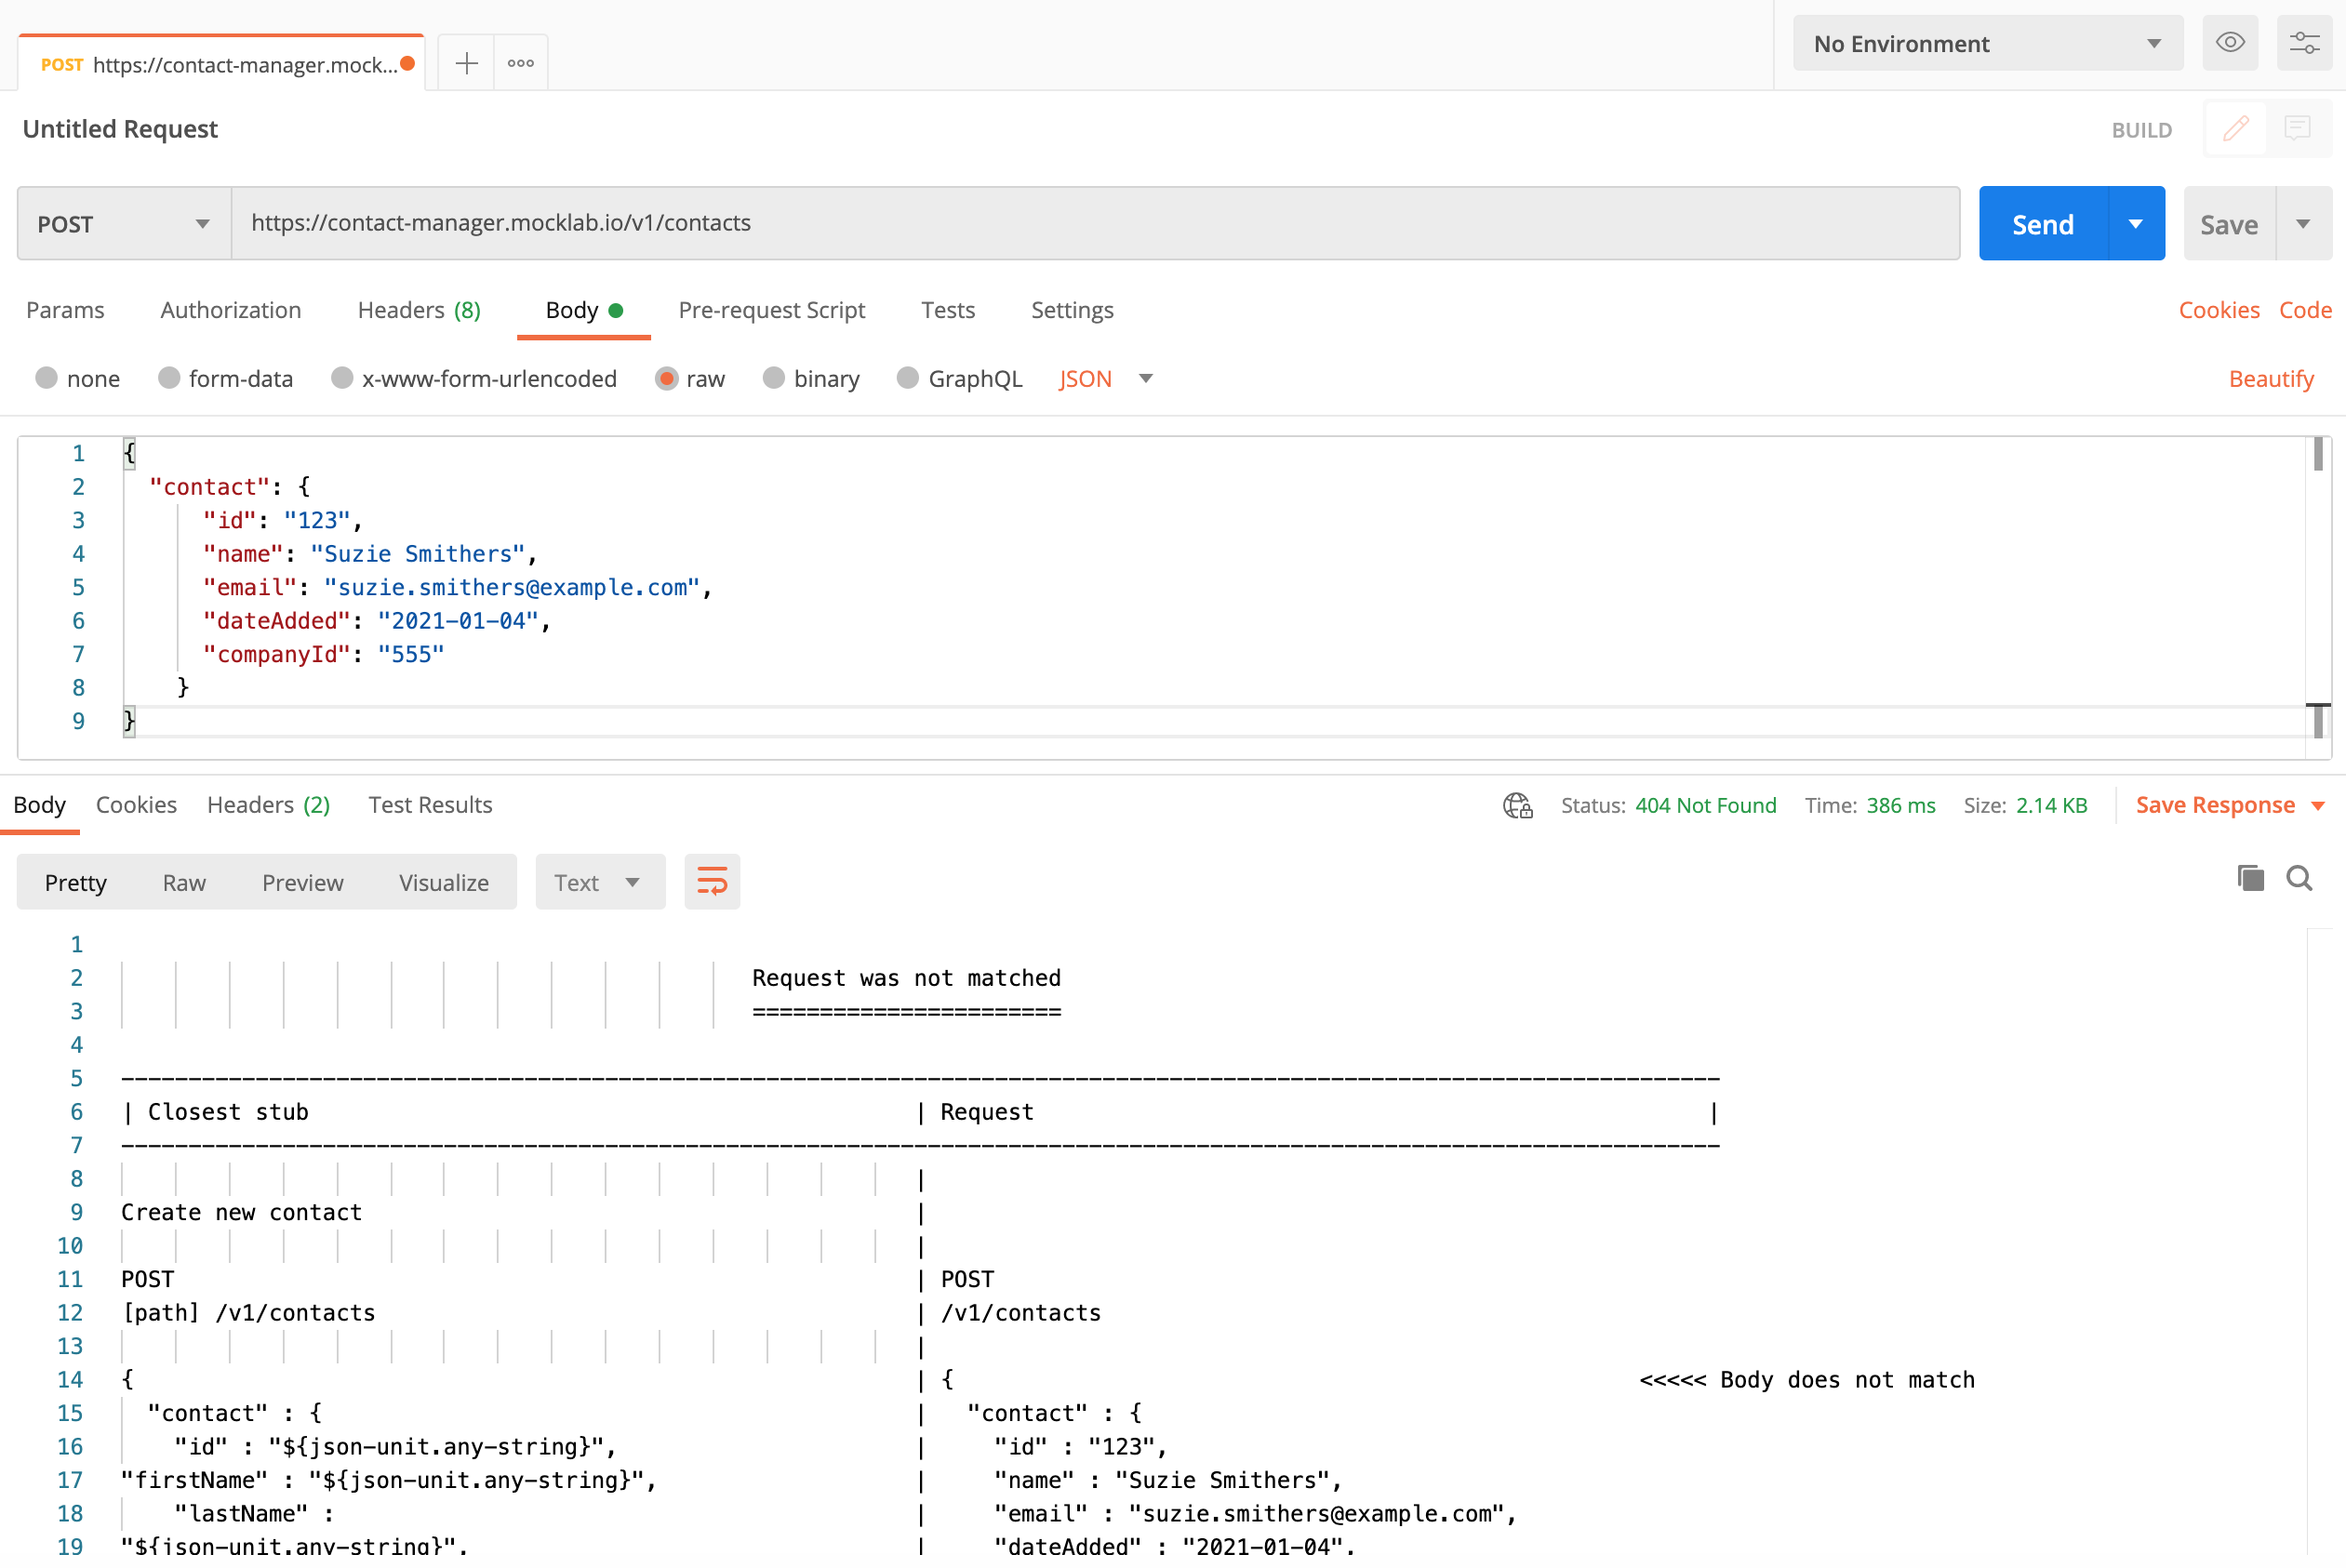
name instead of
firstName and lastName), we’ll get a 404 Not Found response
containing a diff report showing which part of the request didn’t match:
Simulating state changes
When posting a new item of data to a real API we’d expect it to be stored and therefore returned on a subsequentGET request for
the collection or the individual resource. However, mock APIs by default don’t
store any state, so making a request to add a new contact will have no effect on
the data returned later.
For most testing scenarios this isn’t an issue, but in cases where more realistic
behaviour is required WireMock Cloud supports the concept of “stateful scenarios” whereby
the state of a scenario can be used to determine which stub to match.
If we wanted to, for instance, create a test case in which posting a new company
results in it appearing in the companies collection we can achieve this by creating three
stubs, all associated with the same scenario.
Firstly, we’d stub the initial response for GET /v1/companies (in much the same manner as we did
for contacts), returning a single company in the collection:

GET stub cloned from the first but with a second
company added to the collection:

POST to advance the state of the scenario
so that it appears to have the effect of storing the new company:

Testing the scenario
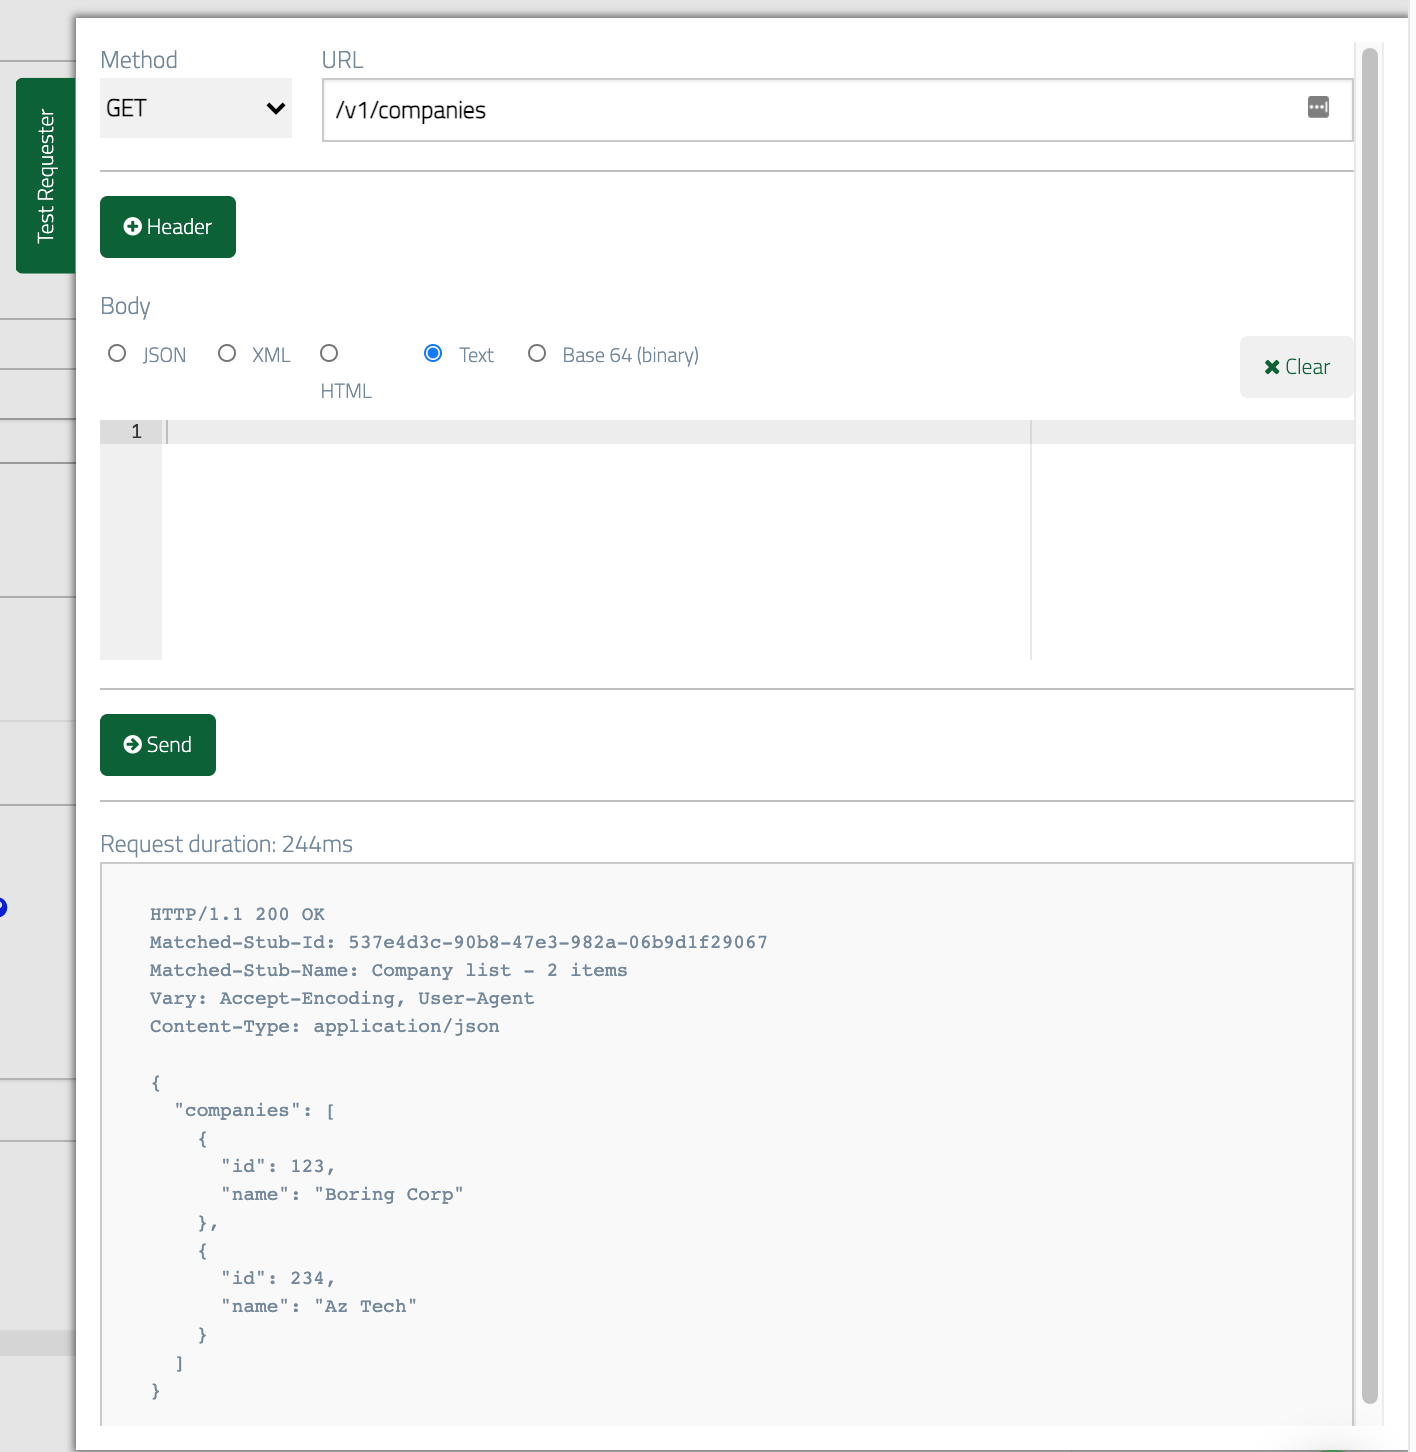
The first time we make a request toGET our companies we should see a single item in the collection:

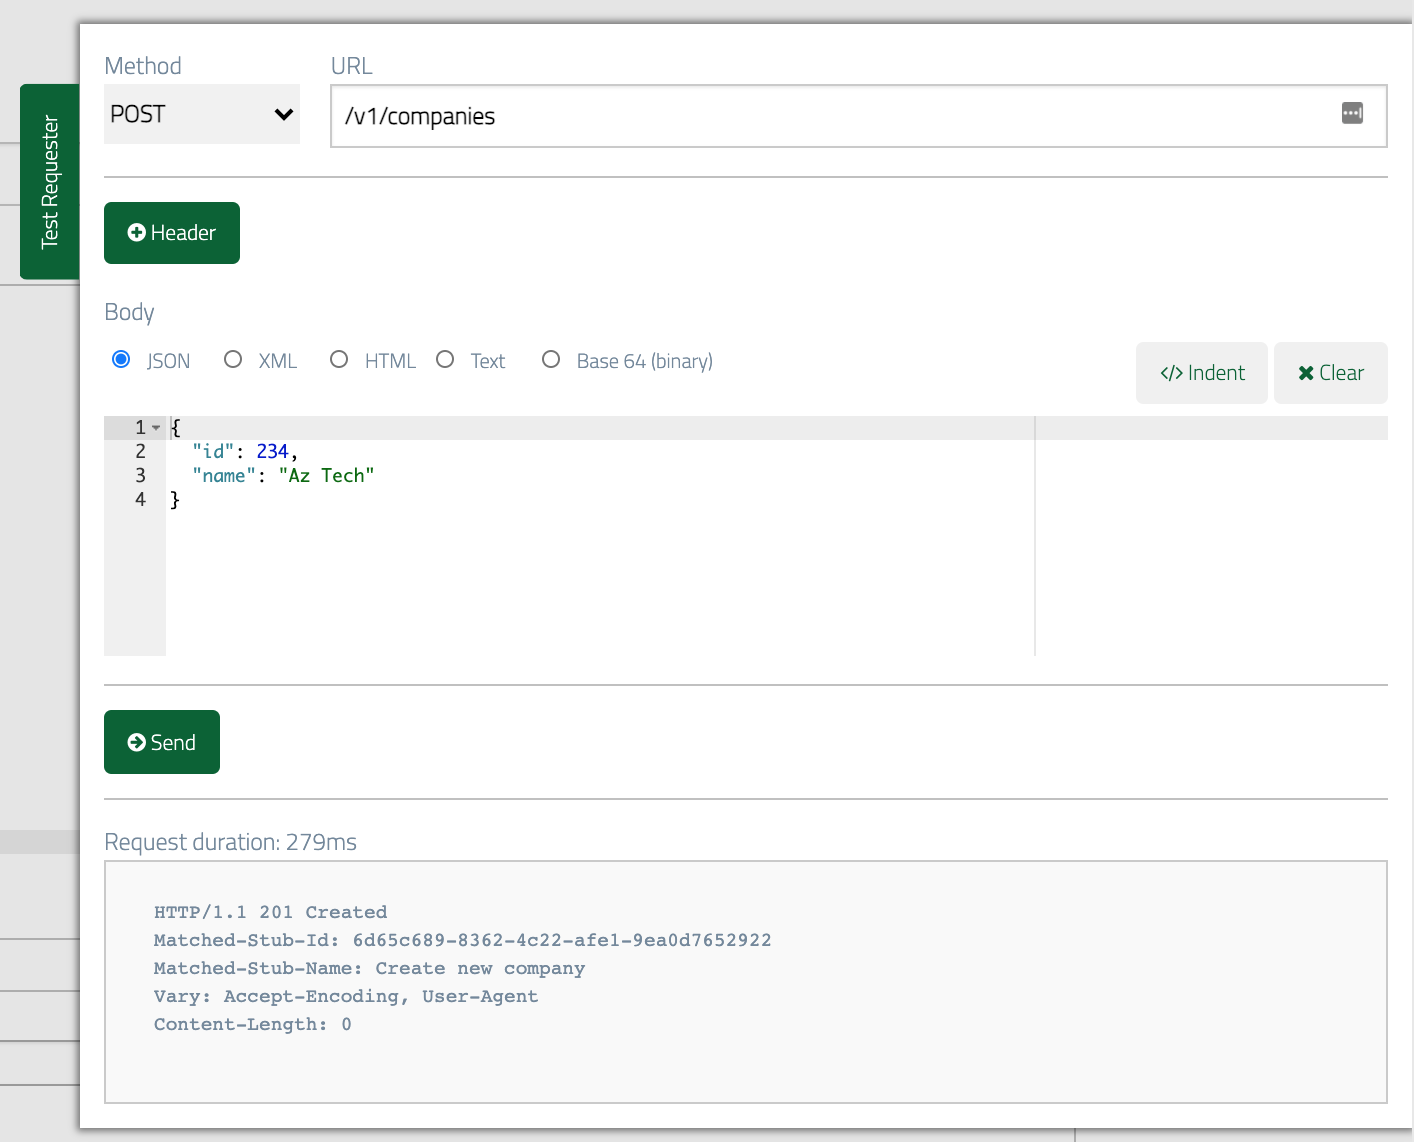
POST a new company:
Returning errors for specific requests
Sometimes we want to be able to support negative tests, for instance when the API we’re calling returns an error rather than the expected response. We can configure our mock API to return errors in response to specific requests with the help of the priority stub parameter. Let’s suppose we want to test the case where our app tries to post a new contact but the API returns a503 Service Unavailable response instead of the expected 201.
If we configure a stub that expects specific data in the request body and give it
a higher priority than the existing POST stub that returns 201 then we can
send a request with appropriate data and see the error returned.
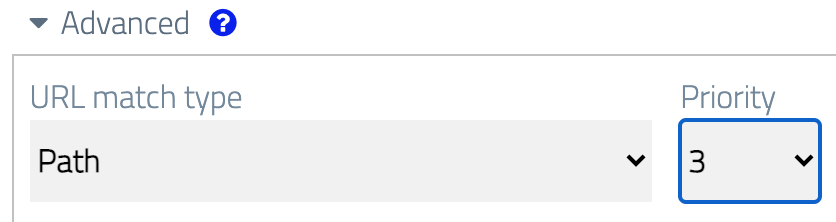
Start by cloning the existing POST stub for new contacts. Change the Priority value to a number
lower than 5 (1 is highest).
equalToJson body match we already have and this would
work fine if we were confident our test could produce exactly the same values each time.
However, we can give ourselves a bit more flexibility by choosing one specific bit of
data and matching it using matchesJsonPath.
Let’s say that if we receive a specific contact ID then we’ll trigger the error.
To do this, change the body match type to matchesJsonPath and the expression to
$.contact.id equalTo 666:

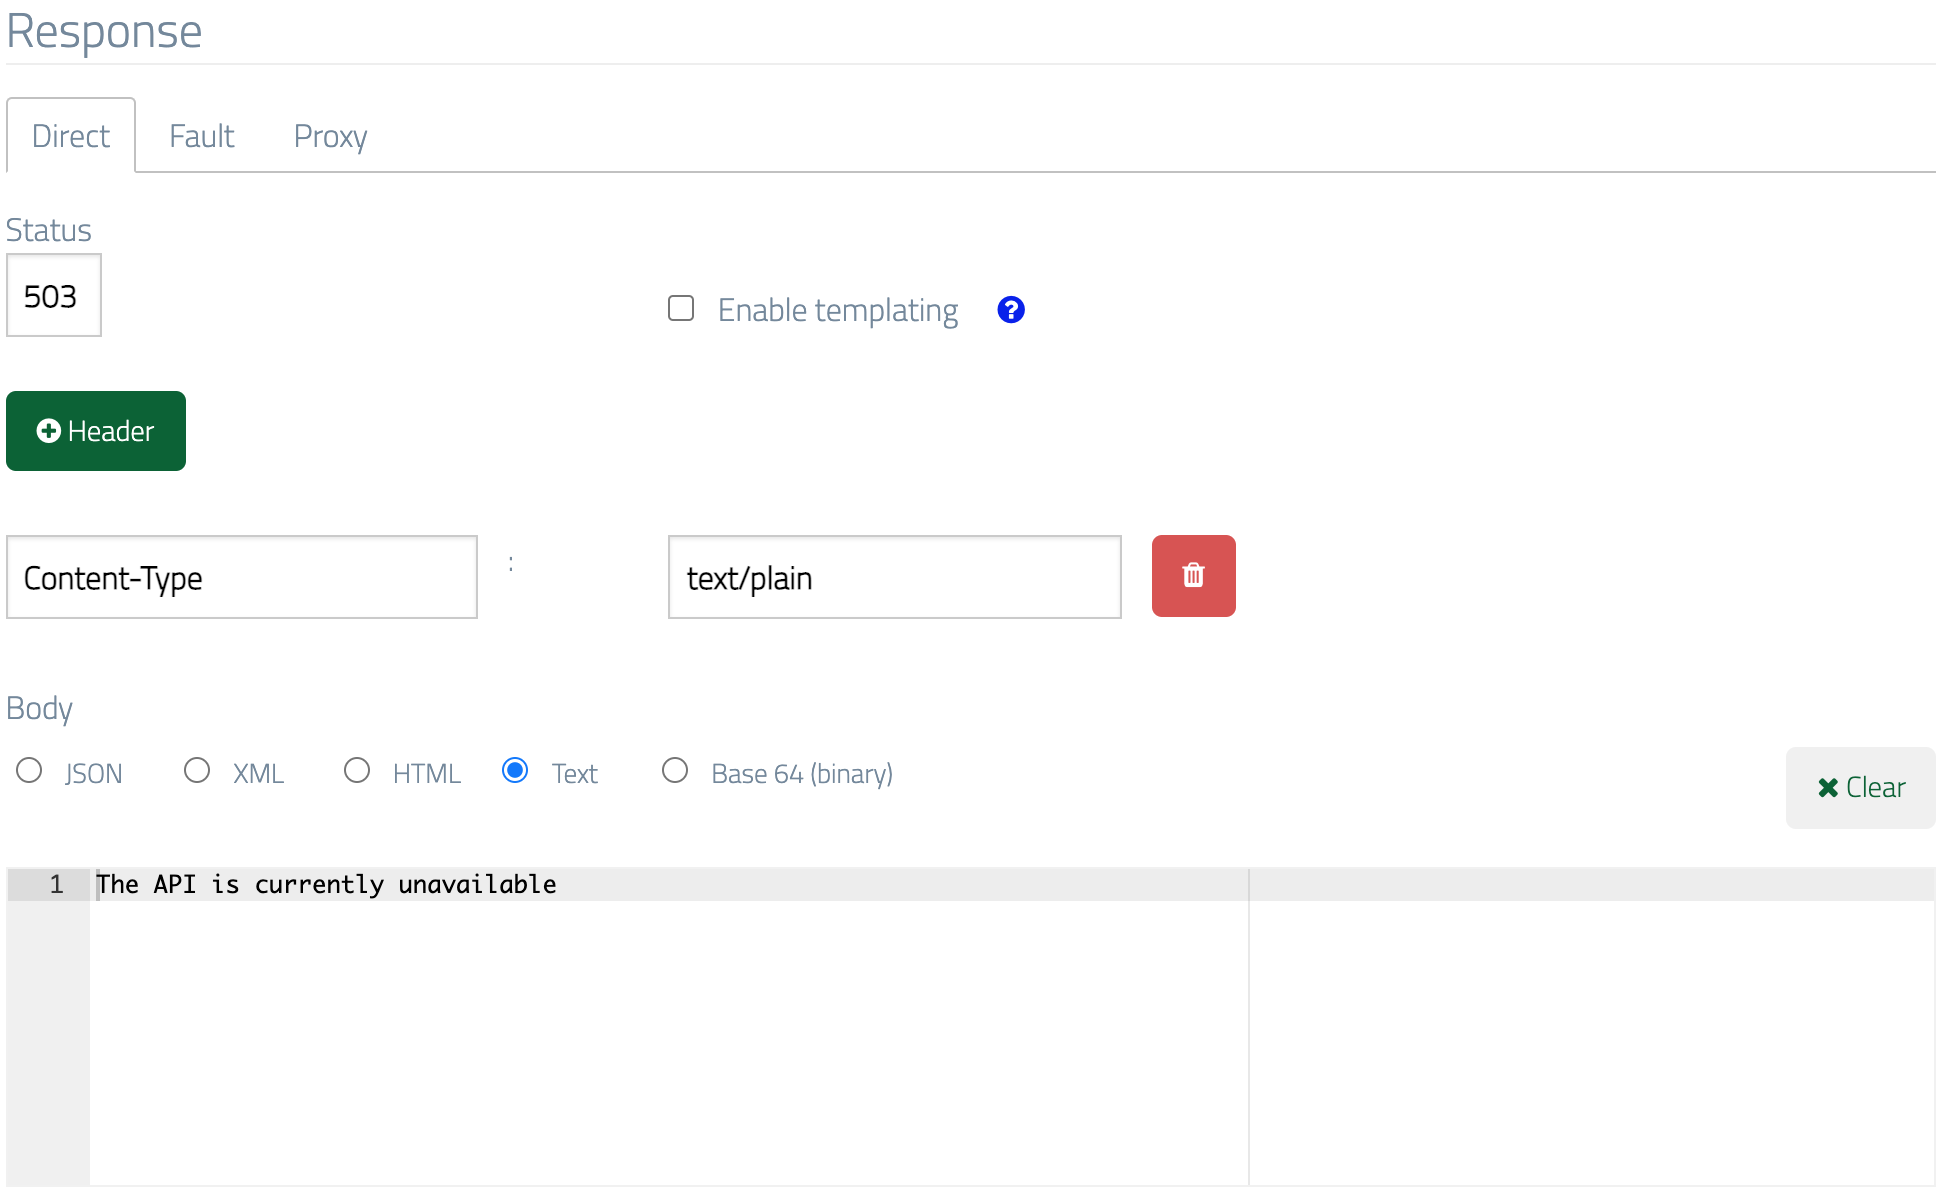
503, and let’s also add a plain text
error message supported by a Content-Type: text/plain header:
Testing the error response
Now we can send a test request and see the error response returned: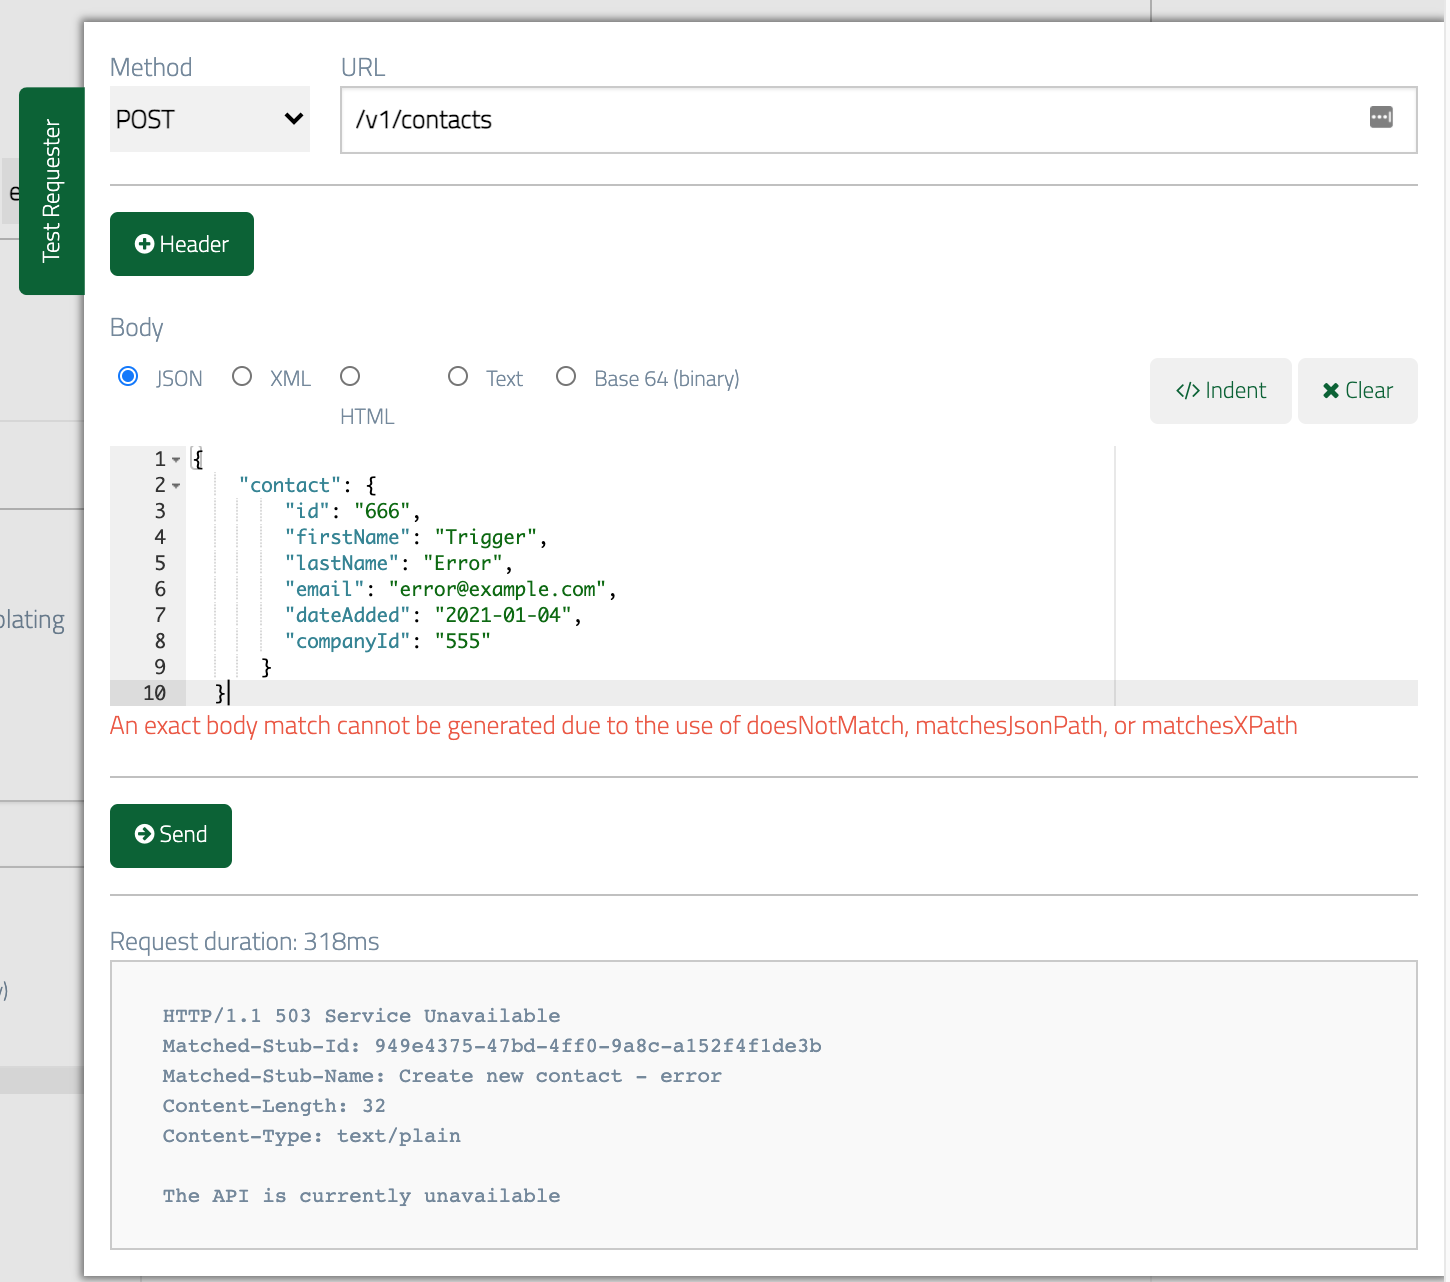
The message in the red text in this case indicates that WireMock Cloud couldn’t automatically generate a valid request body to match our JSONPath expression. This can be safely ignored as we’ve created our own request body.