> ## Documentation Index
> Fetch the complete documentation index at: https://docs.wiremock.io/llms.txt
> Use this file to discover all available pages before exploring further.
# The SAML Identity Provider Mock
> How to mock a SAML Identity Provider
 These instructions will help you set up a SAML Identity Provider Mock in your WireMock Cloud account.
The SAML IDP Mock is a template that simulates a SAML Identity Provider (IdP). It
generates signed SAML responses with configurable user attributes, making it suitable
for testing SAML-based SSO integrations without needing a real IdP.
Instructions are provided for using it as an Auth0 Enterprise Connection, but should be
broadly applicable to use with any other Service Provider (SP).
## Setting up the mock
To set up the SAML Identity Provider Mock in your WireMock Cloud account, follow these steps:
1. Log in to you [WireMock Cloud](https://app.wiremock.cloud/mock-apis) account.
2. Click **Create new mock API**.
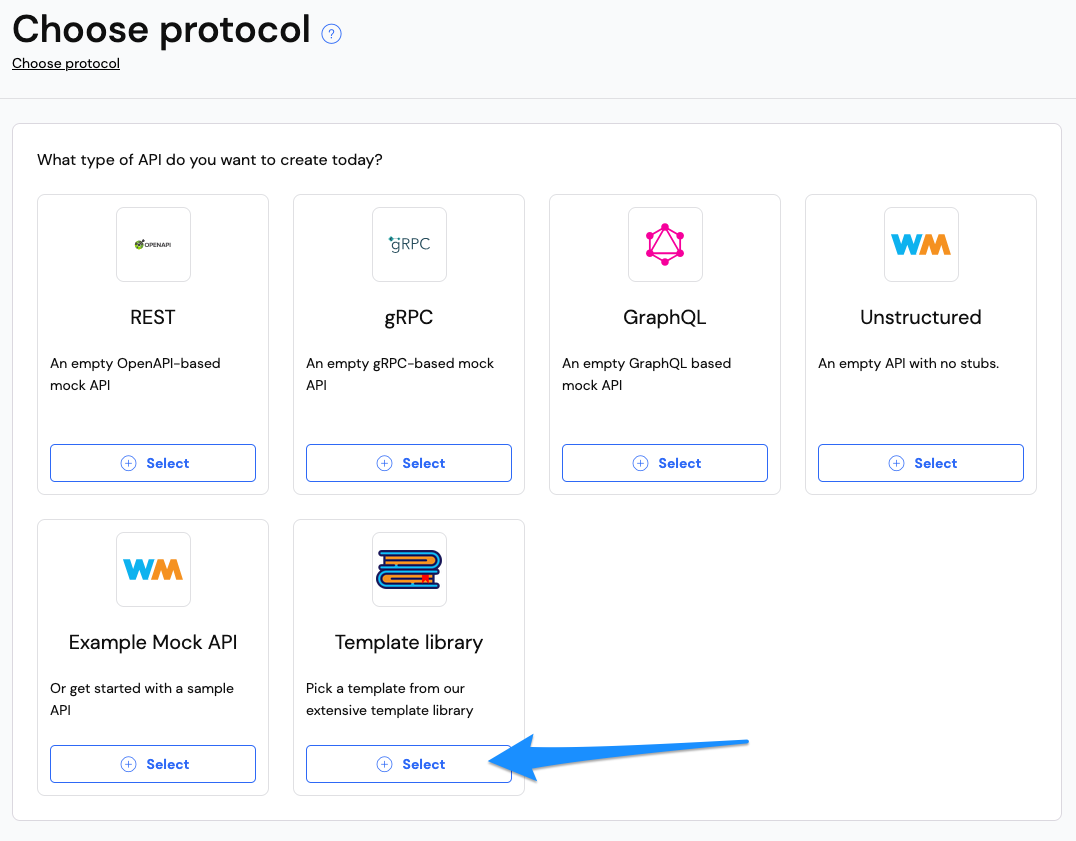
3. On the `Choose protocol` screen, choose `Template library`.
These instructions will help you set up a SAML Identity Provider Mock in your WireMock Cloud account.
The SAML IDP Mock is a template that simulates a SAML Identity Provider (IdP). It
generates signed SAML responses with configurable user attributes, making it suitable
for testing SAML-based SSO integrations without needing a real IdP.
Instructions are provided for using it as an Auth0 Enterprise Connection, but should be
broadly applicable to use with any other Service Provider (SP).
## Setting up the mock
To set up the SAML Identity Provider Mock in your WireMock Cloud account, follow these steps:
1. Log in to you [WireMock Cloud](https://app.wiremock.cloud/mock-apis) account.
2. Click **Create new mock API**.
3. On the `Choose protocol` screen, choose `Template library`.
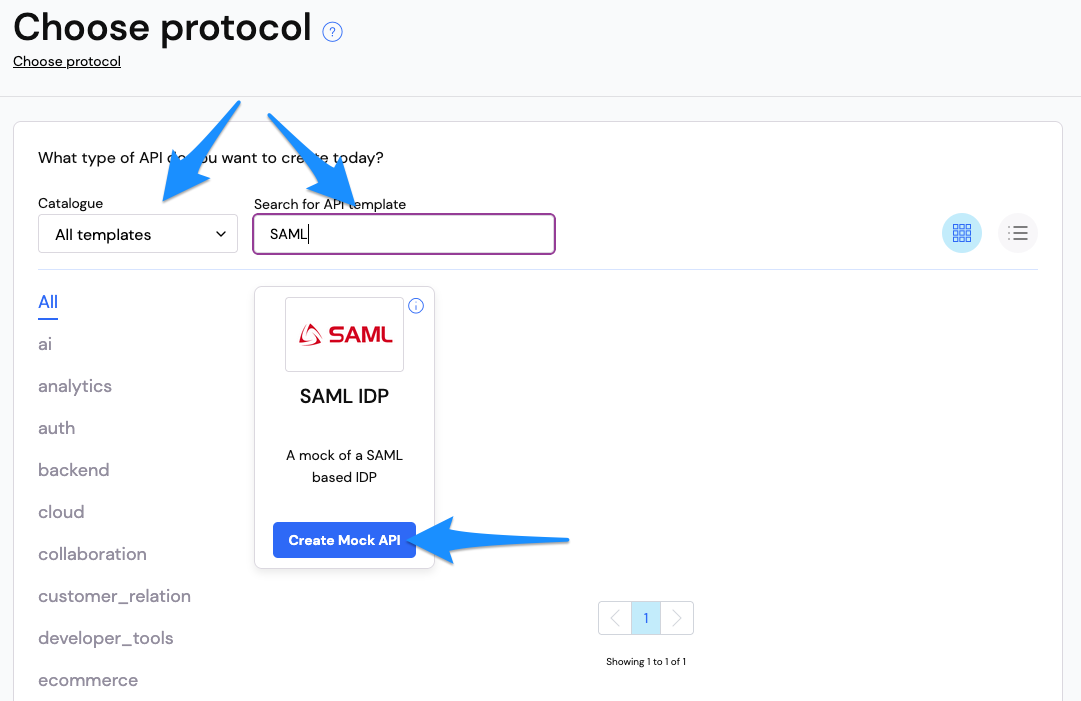
 4. On the template library screen, search for `SAML` and click **Create Mock API** on the `SAML IDP` template.
 5. Give your mock API a name and click **Continue**.
6. This will create the mock API from the template in your WireMock Cloud account.
## How it works
The template provides an interactive web UI with a three-step flow:
1. **Instructions** (`/`) — Setup guide for connecting the mock IdP to your Service Provider (e.g. Auth0)
2. **Login** (`/login`) — A form to configure the post-back URL, email address, and optional extra SAML attributes
3. **Send Response** (`/send-response`) — Builds a signed SAML response and POSTs it back to your SP's ACS URL
The mock IdP also serves its X.509 signing certificate at `/certificate.pem`.
## SAML response structure
The response includes:
* **Issuer** — mock API's base URL
* **Subject** — NameID using email (format: `emailAddress`)
* **Conditions** — NotBefore (now - 1 min), NotOnOrAfter (now + 5 min), with audience from the SAML request
* **Attributes** — `email` attribute plus any extra `` tags from the login form
* **AuthnStatement** — `PasswordProtectedTransport` context class
* **Signature** — SHA-256 digest, RSA-SHA256 signature, enveloped signature transform
## Setup
To set up the SAML Identity Provider Mock as an Enterprise Connection, copy the base URL
of the mock API and open it in your browser. You should see a page with instructions for
setting up the connection.
5. Give your mock API a name and click **Continue**.
6. This will create the mock API from the template in your WireMock Cloud account.
## How it works
The template provides an interactive web UI with a three-step flow:
1. **Instructions** (`/`) — Setup guide for connecting the mock IdP to your Service Provider (e.g. Auth0)
2. **Login** (`/login`) — A form to configure the post-back URL, email address, and optional extra SAML attributes
3. **Send Response** (`/send-response`) — Builds a signed SAML response and POSTs it back to your SP's ACS URL
The mock IdP also serves its X.509 signing certificate at `/certificate.pem`.
## SAML response structure
The response includes:
* **Issuer** — mock API's base URL
* **Subject** — NameID using email (format: `emailAddress`)
* **Conditions** — NotBefore (now - 1 min), NotOnOrAfter (now + 5 min), with audience from the SAML request
* **Attributes** — `email` attribute plus any extra `` tags from the login form
* **AuthnStatement** — `PasswordProtectedTransport` context class
* **Signature** — SHA-256 digest, RSA-SHA256 signature, enveloped signature transform
## Setup
To set up the SAML Identity Provider Mock as an Enterprise Connection, copy the base URL
of the mock API and open it in your browser. You should see a page with instructions for
setting up the connection.
 You will see the following instructions:
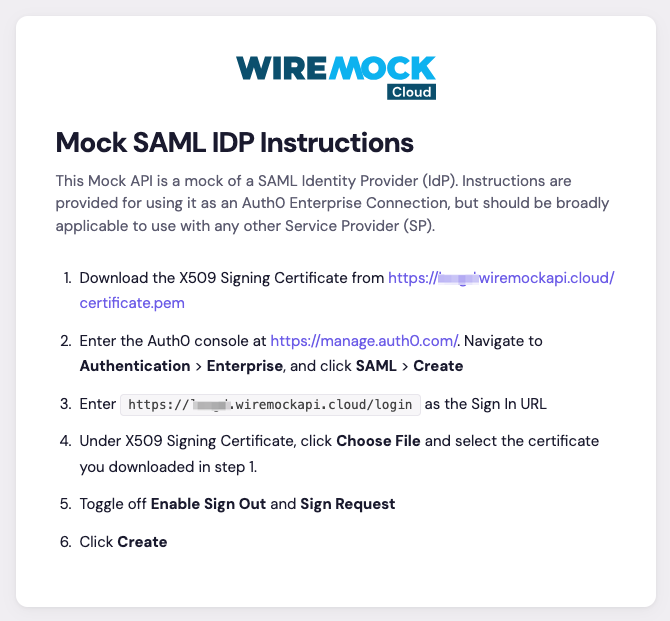 1. Download the signing certificate from `/certificate.pem`
2. In Auth0, navigate to **Authentication** > **Enterprise**, click **SAML** > **Create**
3. Set **Sign In URL** to `/login`
4. Upload the certificate from step 1
5. Toggle off **Enable Sign Out** and **Sign Request**
6. Click **Create**
In the `Login Experience` tab you should specify your domain in the `Identity Provider domains` field
and remember to toggle on the applications you want to associate with this connection in the `Applications` tab.
## Using with your app
1. Login to your application using an account with an email address that matches the domain you specified in the connection setup.
2. This should recognize the connection associated with the domain and redirect you to the `/login` page of the mock IdP.
3. This will display the following form:
1. Download the signing certificate from `/certificate.pem`
2. In Auth0, navigate to **Authentication** > **Enterprise**, click **SAML** > **Create**
3. Set **Sign In URL** to `/login`
4. Upload the certificate from step 1
5. Toggle off **Enable Sign Out** and **Sign Request**
6. Click **Create**
In the `Login Experience` tab you should specify your domain in the `Identity Provider domains` field
and remember to toggle on the applications you want to associate with this connection in the `Applications` tab.
## Using with your app
1. Login to your application using an account with an email address that matches the domain you specified in the connection setup.
2. This should recognize the connection associated with the domain and redirect you to the `/login` page of the mock IdP.
3. This will display the following form:
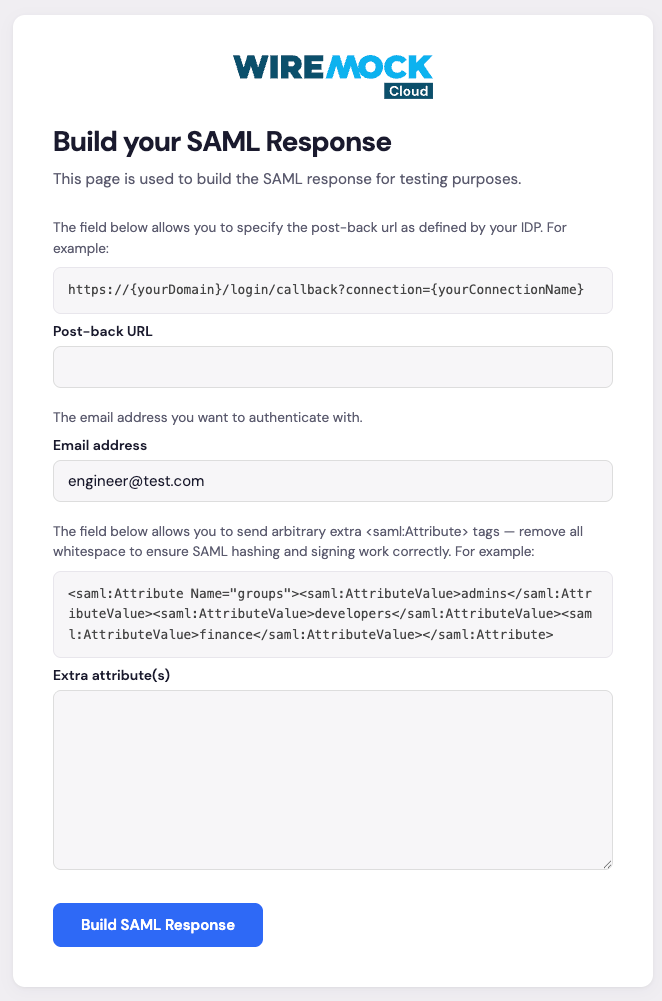 1. Fill out the post-back URL as defined by your IDP. **This is a required field**. This is likely to be the same
across all authentication requests for the same domain/connection. If this is the case you could update the response template to
hardcode this value.
2. Enter the email address of the user you want to authenticate. **This is a required field**.
3. The `Extra attribute(s)` allows you to send arbitrary extra `` tags.
It is important to remove all whitespace to ensure SAML hashing and signing work correctly. For example
```xml theme={null}
adminsdevelopersfinance
```
Once you have filled out the form, click on the `Build SAML Response` button. This will
take you to the `/send-response` page of the mock IdP, showing the SAML response that was built.
1. Fill out the post-back URL as defined by your IDP. **This is a required field**. This is likely to be the same
across all authentication requests for the same domain/connection. If this is the case you could update the response template to
hardcode this value.
2. Enter the email address of the user you want to authenticate. **This is a required field**.
3. The `Extra attribute(s)` allows you to send arbitrary extra `` tags.
It is important to remove all whitespace to ensure SAML hashing and signing work correctly. For example
```xml theme={null}
adminsdevelopersfinance
```
Once you have filled out the form, click on the `Build SAML Response` button. This will
take you to the `/send-response` page of the mock IdP, showing the SAML response that was built.
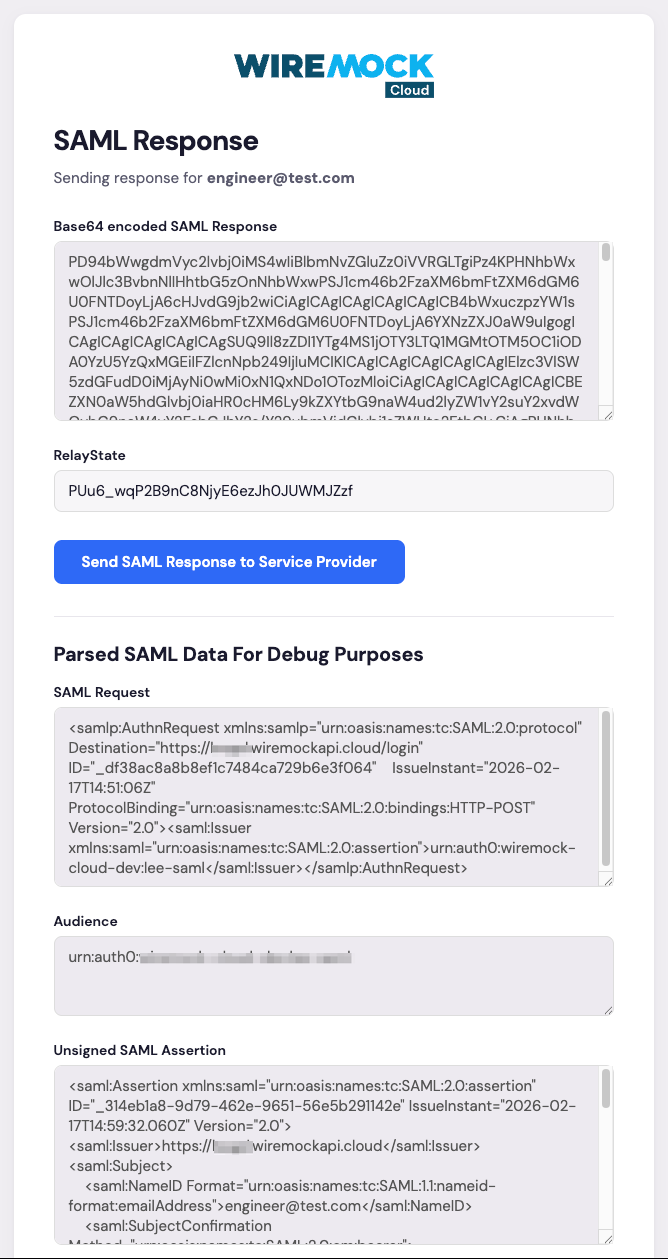 This form shows you the SAML response that was built along with the parsed values for you to use for debugging if required.
Click on the `Send SAML Response to Service Provider` button to send the response back to your SP.
You should then be authenticated and redirected back to your application.
## Questions and feedback
If you're not sure how something works or have a suggestion for improving this simulation, please get in touch with us
via [info@wiremock.io](mailto:info@wiremock.io) or the chat widget.
This form shows you the SAML response that was built along with the parsed values for you to use for debugging if required.
Click on the `Send SAML Response to Service Provider` button to send the response back to your SP.
You should then be authenticated and redirected back to your application.
## Questions and feedback
If you're not sure how something works or have a suggestion for improving this simulation, please get in touch with us
via [info@wiremock.io](mailto:info@wiremock.io) or the chat widget.