> ## Documentation Index
> Fetch the complete documentation index at: https://docs.wiremock.io/llms.txt
> Use this file to discover all available pages before exploring further.
# Installing the WireMock Cloud MCP server directly
> How to connect an AI tool directly to the WireMock Cloud MCP server, without the agent skills plugin
This guide walks you through configuring the MCP (Model Context Protocol) server necessary to natively use WireMock Cloud from an MCP-compatible AI tool such as Cursor or Claude Desktop.
This enables automatic API discovery, mocking and test abstraction from any codebase as part of prompt-driven development with your chosen AI tool.
Additionally, it enables you to skip the complexity of building out new services early on - which can hamper the rapid development by introducing more failure points - and instead use simulated APIs on WireMock to prototype new capabilities with less system overhead.
Most users should install the [WireMock Cloud agent skills plugin](/ai-mcp/installation) instead - it bundles this same MCP server connection alongside expert guidance for your agent, with no separate setup step. Use this page if you want the MCP server on its own, without the skills plugin.
**Note** that while this article documents use with Cursor, Claude Desktop and VSCode specifically, WireMock Cloud’s MCP server will work with any AI-powered tool that supports MCP.
## Choosing a server
WireMock Cloud offers two ways to connect an AI tool via MCP:
* **Remote server (recommended)** - a hosted HTTP server at `https://mcp.wiremock.cloud/mcp`. No local installation is required; your AI tool authenticates with your WireMock Cloud account via an OAuth sign-in in your browser the first time it connects.
* **Local server** - a stdio server launched on your machine by the WireMock CLI (`wiremock mcp`). Choose this if you need [HTTP request authentication](/ai-mcp/http-request-authentication) with locally stored credentials, or if your network can't reach `mcp.wiremock.cloud` directly.
Both expose the same set of [MCP tools](/ai-mcp/mcp-tools). Use whichever matches your setup - you only need one.
## Option 1: Remote server (recommended)
No prerequisites beyond an existing WireMock Cloud account - if you don't have one, the OAuth step below will guide you through creating one.
Click this button to install with Cursor:
 Or, follow these instructions:
* Open Settings->Cursor settings.
* Navigate to Tools & Integrations.
* Click New MCP Server. This opens `mcp.json`.
* Add the WireMock server:
```json theme={null}
{
"mcpServers": {
"WireMock": {
"url": "https://mcp.wiremock.cloud/mcp"
}
}
}
```
* Save the file. Cursor will show a "needs authentication" indicator next to the server - click **Connect** to complete an OAuth sign-in in your browser.
### Step 2: Confirm your setup
To confirm everything is working correctly, check that you're logged in to WireMock Cloud by running the following prompt:
```
Am I logged into WireMock Cloud?
```
If logged in, you'll see your account details rather than being prompted to sign in.
* In VSCode, open the `settings.json` file via Settings...->Settings then clicking the Open Settings (JSON) link in the top right.
* Add the `mcp` element to the settings JSON:
```json theme={null}
{
"mcp": {
"servers": {
"WireMock": {
"type": "http",
"url": "https://mcp.wiremock.cloud/mcp"
}
}
}
}
```
* Restart VSCode. VS Code will open a browser window to complete an OAuth sign-in the first time it connects - approve the trust dialog and sign in when prompted.
### Step 2: Confirm your setup
Open the Copilot chat window and confirm that the tools icon is present with a number above zero:
Or, follow these instructions:
* Open Settings->Cursor settings.
* Navigate to Tools & Integrations.
* Click New MCP Server. This opens `mcp.json`.
* Add the WireMock server:
```json theme={null}
{
"mcpServers": {
"WireMock": {
"url": "https://mcp.wiremock.cloud/mcp"
}
}
}
```
* Save the file. Cursor will show a "needs authentication" indicator next to the server - click **Connect** to complete an OAuth sign-in in your browser.
### Step 2: Confirm your setup
To confirm everything is working correctly, check that you're logged in to WireMock Cloud by running the following prompt:
```
Am I logged into WireMock Cloud?
```
If logged in, you'll see your account details rather than being prompted to sign in.
* In VSCode, open the `settings.json` file via Settings...->Settings then clicking the Open Settings (JSON) link in the top right.
* Add the `mcp` element to the settings JSON:
```json theme={null}
{
"mcp": {
"servers": {
"WireMock": {
"type": "http",
"url": "https://mcp.wiremock.cloud/mcp"
}
}
}
}
```
* Restart VSCode. VS Code will open a browser window to complete an OAuth sign-in the first time it connects - approve the trust dialog and sign in when prompted.
### Step 2: Confirm your setup
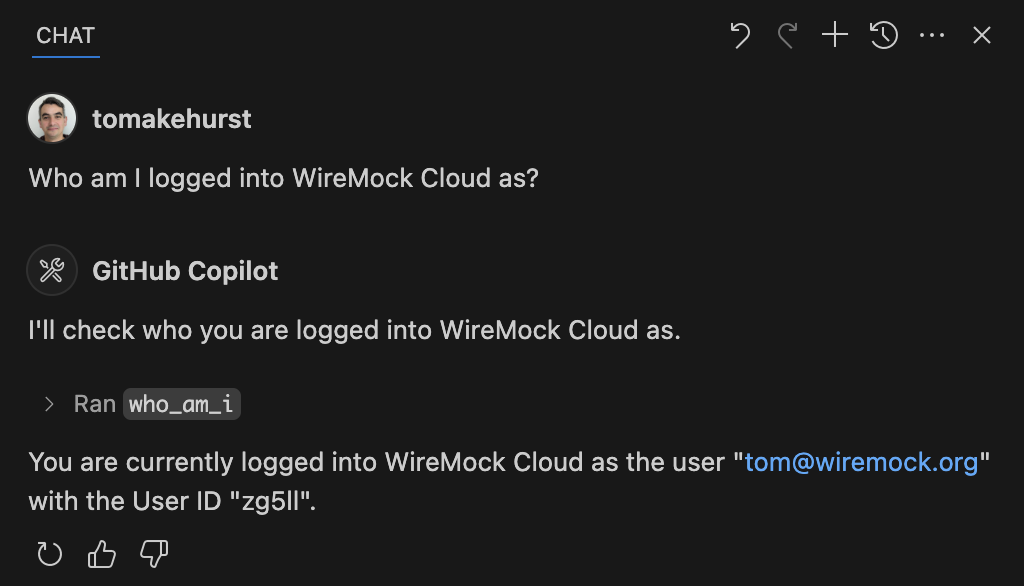
Open the Copilot chat window and confirm that the tools icon is present with a number above zero:
 To confirm everything is working correctly, check that you’re logged in to WireMock Cloud by running the following prompt:
```
Who am I logged into WireMock Cloud as?
```
If logged in, you’ll see your account details rather than being prompted to sign in.
To confirm everything is working correctly, check that you’re logged in to WireMock Cloud by running the following prompt:
```
Who am I logged into WireMock Cloud as?
```
If logged in, you’ll see your account details rather than being prompted to sign in.
 * Open your terminal or command prompt.
* Add the WireMock MCP server using the Claude CLI, specifying the HTTP transport:
```bash theme={null}
claude mcp add --transport http wiremock https://mcp.wiremock.cloud/mcp
```
* Verify the server was added successfully:
```bash theme={null}
claude mcp list
```
* You should see "wiremock" in the list of configured MCP servers. If it shows "Needs authentication", run `/mcp` inside a Claude Code session (or `claude mcp login wiremock` from the shell) and complete the OAuth sign-in that opens in your browser.
### Step 2: Confirm your setup
To confirm everything is working correctly, check that you're logged in to WireMock Cloud by running the following prompt in Claude Code:
```
Am I logged into WireMock Cloud?
```
If logged in, you'll see your account details.
* Open Settings->Connectors.
* Click **Add custom connector**.
* Enter the WireMock MCP server URL:
```
https://mcp.wiremock.cloud/mcp
```
* Click **Add**. Claude Desktop will open a browser window to complete an OAuth sign-in immediately after the connector is added.
### Step 2: Confirm your setup
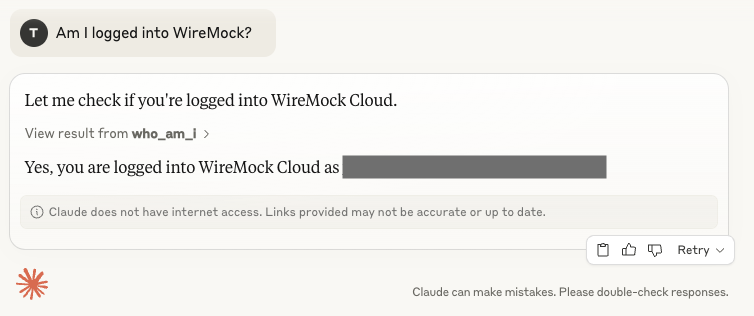
To confirm everything is working correctly, check that you’re logged in to WireMock Cloud by running the following prompt:
```
Am I logged into WireMock Cloud?
```
After confirming it is OK for Claude to use the tool, if logged in, you’ll see your account details rather than being prompted to sign in.
* Open your terminal or command prompt.
* Add the WireMock MCP server using the Claude CLI, specifying the HTTP transport:
```bash theme={null}
claude mcp add --transport http wiremock https://mcp.wiremock.cloud/mcp
```
* Verify the server was added successfully:
```bash theme={null}
claude mcp list
```
* You should see "wiremock" in the list of configured MCP servers. If it shows "Needs authentication", run `/mcp` inside a Claude Code session (or `claude mcp login wiremock` from the shell) and complete the OAuth sign-in that opens in your browser.
### Step 2: Confirm your setup
To confirm everything is working correctly, check that you're logged in to WireMock Cloud by running the following prompt in Claude Code:
```
Am I logged into WireMock Cloud?
```
If logged in, you'll see your account details.
* Open Settings->Connectors.
* Click **Add custom connector**.
* Enter the WireMock MCP server URL:
```
https://mcp.wiremock.cloud/mcp
```
* Click **Add**. Claude Desktop will open a browser window to complete an OAuth sign-in immediately after the connector is added.
### Step 2: Confirm your setup
To confirm everything is working correctly, check that you’re logged in to WireMock Cloud by running the following prompt:
```
Am I logged into WireMock Cloud?
```
After confirming it is OK for Claude to use the tool, if logged in, you’ll see your account details rather than being prompted to sign in.
 * Navigate to **Windsurf Settings** > **Cascade** > **Plugins**.
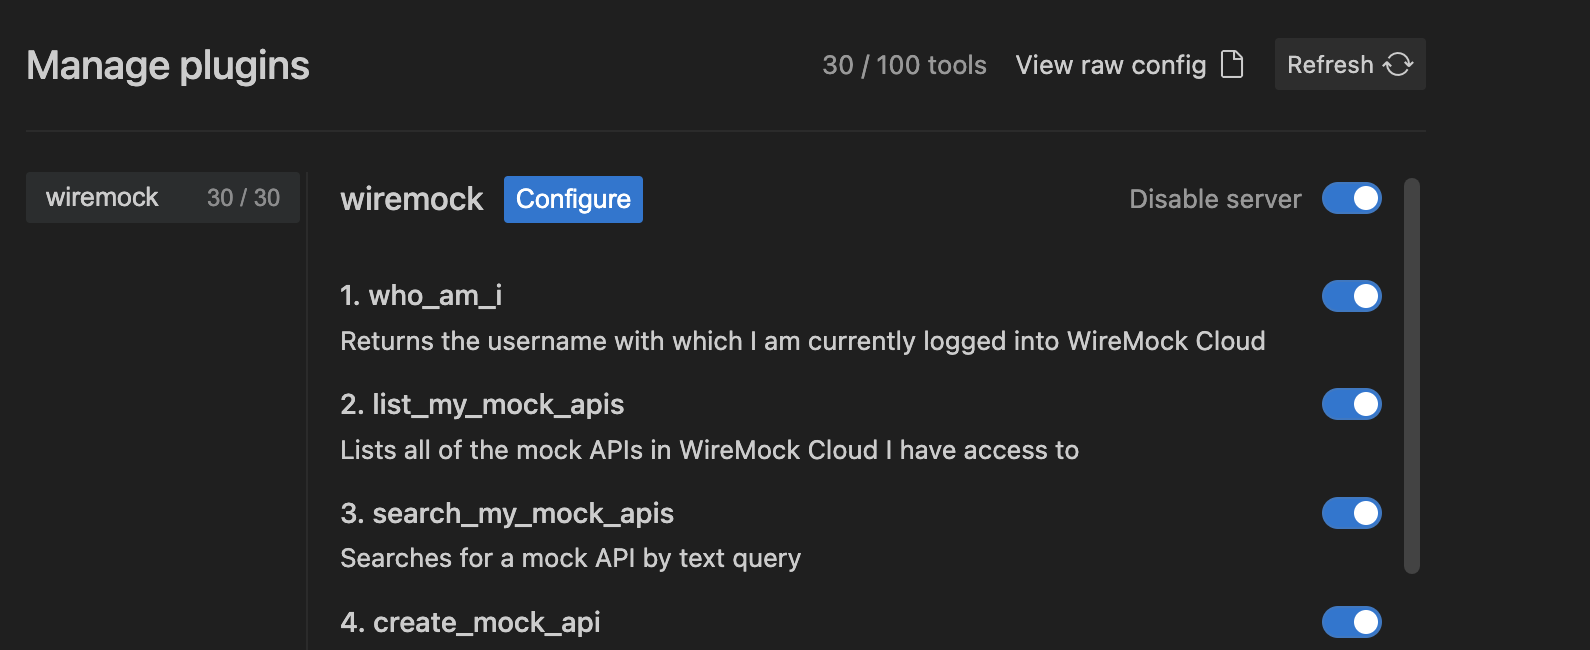
* Click **Manage plugins** to access the raw configuration.
* Click **View raw config** to edit the `mcp_config.json` file (located at `~/.codeium/windsurf/mcp_config.json`) and add:
```json theme={null}
{
"mcpServers": {
"WireMock": {
"serverUrl": "https://mcp.wiremock.cloud/mcp"
}
}
}
```
* Save the configuration and press the refresh button in the Plugin Store. Windsurf will prompt you to sign in via OAuth in your browser on first connection.
* Navigate to **Windsurf Settings** > **Cascade** > **Plugins**.
* Click **Manage plugins** to access the raw configuration.
* Click **View raw config** to edit the `mcp_config.json` file (located at `~/.codeium/windsurf/mcp_config.json`) and add:
```json theme={null}
{
"mcpServers": {
"WireMock": {
"serverUrl": "https://mcp.wiremock.cloud/mcp"
}
}
}
```
* Save the configuration and press the refresh button in the Plugin Store. Windsurf will prompt you to sign in via OAuth in your browser on first connection.
 ### Step 2: Confirm your setup
To confirm everything is working correctly, check that you're logged in to WireMock Cloud by running the following prompt in Cascade:
```
Am I logged into WireMock Cloud?
```
If logged in, you'll see your account details rather than being prompted to sign in.
## Option 2: Local server
### Prerequisites
* Node.js 18+ (to install the CLI)
* An existing WireMock Cloud account (if you don’t have one, you can sign up during the login step)
### Step 1: Install the WireMock CLI
Install the CLI globally using npm:
```bash theme={null}
npm i -g @wiremock/cli
```
### Step 2: Log in to WireMock Cloud
If you already have a WireMock Cloud account, simply log in. Otherwise, the login process will guide you through creating an account:
```bash theme={null}
wiremock login
```
### Step 3: Configure your AI tool
Click this button to install with Cursor:
Or, follow these instructions:
* Open Settings->Cursor settings.
* Navigate to MCP.
* Click Add new MCP server.
* In the dialog, configure your server to run this command:
```bash theme={null}
wiremock mcp
```
### Step 2: Confirm your setup
To confirm everything is working correctly, check that you're logged in to WireMock Cloud by running the following prompt in Cascade:
```
Am I logged into WireMock Cloud?
```
If logged in, you'll see your account details rather than being prompted to sign in.
## Option 2: Local server
### Prerequisites
* Node.js 18+ (to install the CLI)
* An existing WireMock Cloud account (if you don’t have one, you can sign up during the login step)
### Step 1: Install the WireMock CLI
Install the CLI globally using npm:
```bash theme={null}
npm i -g @wiremock/cli
```
### Step 2: Log in to WireMock Cloud
If you already have a WireMock Cloud account, simply log in. Otherwise, the login process will guide you through creating an account:
```bash theme={null}
wiremock login
```
### Step 3: Configure your AI tool
Click this button to install with Cursor:
Or, follow these instructions:
* Open Settings->Cursor settings.
* Navigate to MCP.
* Click Add new MCP server.
* In the dialog, configure your server to run this command:
```bash theme={null}
wiremock mcp
```
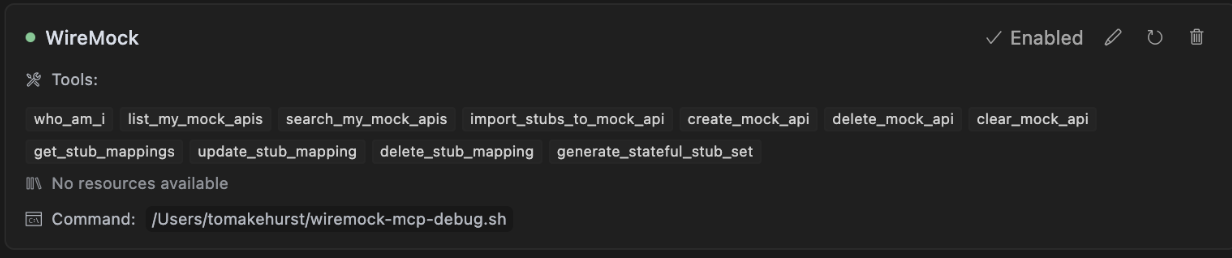
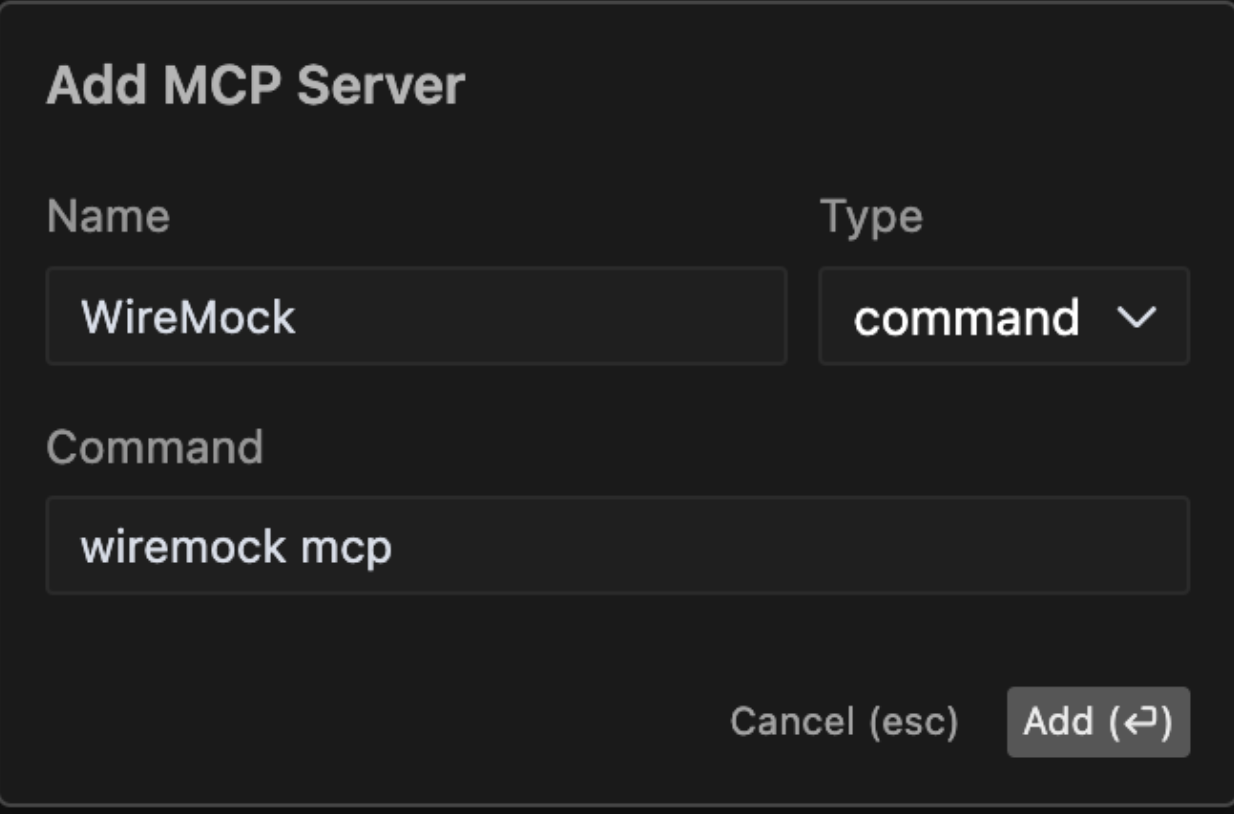 * Verify Installation by looking for the green status dot next to the MCP server and the list of tool names.
 If you have an existing real API integration, you can replace it with a WireMock stub. Generate the mock from documentation, source code, or other external description formats. This enables you to test your app in isolation without depending on live services.
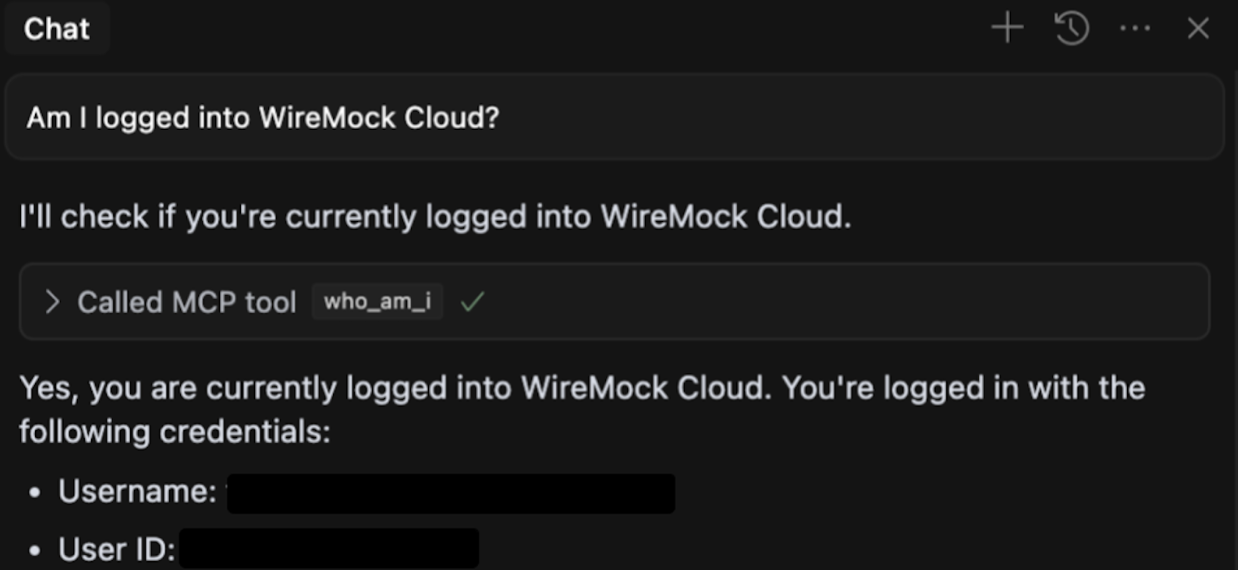
### Step 4: Confirm your setup
To confirm everything is working correctly, check that you’re logged in to WireMock Cloud by running the following prompt:
```
Am I logged into WireMock Cloud?
```
If logged in, you’ll see your account details rather than being prompted to sign in.
If you have an existing real API integration, you can replace it with a WireMock stub. Generate the mock from documentation, source code, or other external description formats. This enables you to test your app in isolation without depending on live services.
### Step 4: Confirm your setup
To confirm everything is working correctly, check that you’re logged in to WireMock Cloud by running the following prompt:
```
Am I logged into WireMock Cloud?
```
If logged in, you’ll see your account details rather than being prompted to sign in.
 * In VSCode, open the `settings.json` file via Settings...->Settings then clicking the Open Settings (JSON) link in the top right.
* Add the `mcp` element to the settings JSON:
```json theme={null}
{
"mcp": {
"servers": {
"WireMock": {
"type": "stdio",
"command": "wiremock",
"args": [
"mcp"
]
}
}
}
}
```
* Restart VSCode
### Step 4: Confirm your setup
Open the Copilot chat window and confirm that the tools icon is present with a number above zero:
To confirm everything is working correctly, check that you’re logged in to WireMock Cloud by running the following prompt:
```
Who am I logged into WireMock Cloud as?
```
If logged in, you’ll see your account details rather than being prompted to sign in.
* Open your terminal or command prompt.
* Add the WireMock MCP server using the Claude CLI:
```bash theme={null}
claude mcp add wiremock -- wiremock mcp
```
* Verify the server was added successfully:
```bash theme={null}
claude mcp list
```
* In VSCode, open the `settings.json` file via Settings...->Settings then clicking the Open Settings (JSON) link in the top right.
* Add the `mcp` element to the settings JSON:
```json theme={null}
{
"mcp": {
"servers": {
"WireMock": {
"type": "stdio",
"command": "wiremock",
"args": [
"mcp"
]
}
}
}
}
```
* Restart VSCode
### Step 4: Confirm your setup
Open the Copilot chat window and confirm that the tools icon is present with a number above zero:
To confirm everything is working correctly, check that you’re logged in to WireMock Cloud by running the following prompt:
```
Who am I logged into WireMock Cloud as?
```
If logged in, you’ll see your account details rather than being prompted to sign in.
* Open your terminal or command prompt.
* Add the WireMock MCP server using the Claude CLI:
```bash theme={null}
claude mcp add wiremock -- wiremock mcp
```
* Verify the server was added successfully:
```bash theme={null}
claude mcp list
```
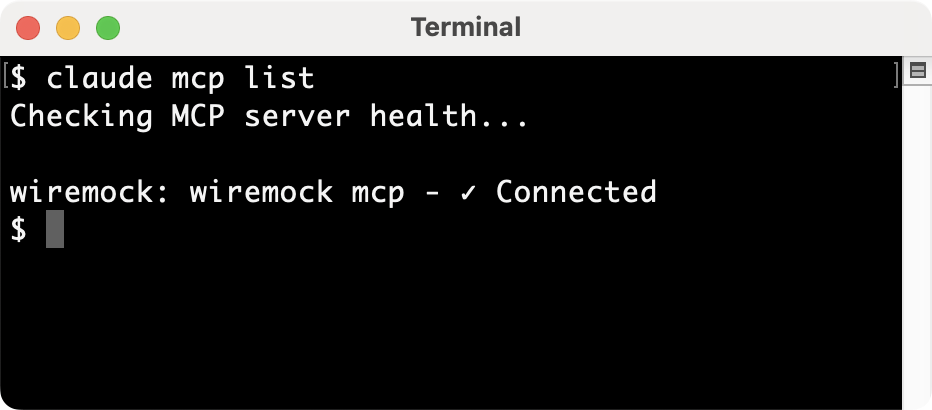 * You should see "wiremock" in the list of configured MCP servers.
### Step 4: Confirm your setup
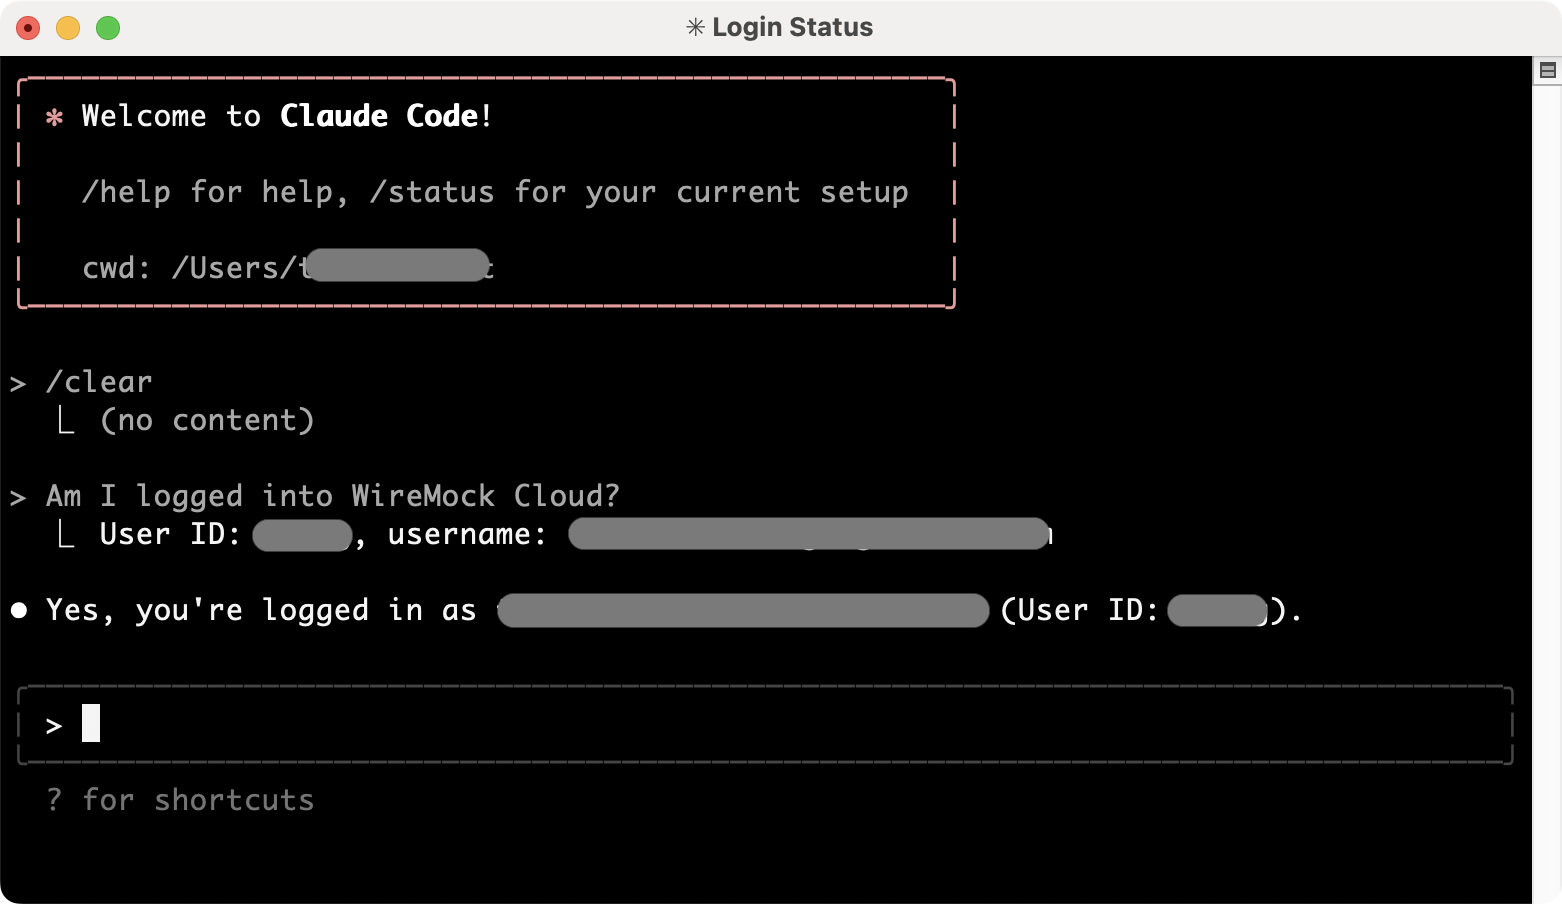
To confirm everything is working correctly, check that you're logged in to WireMock Cloud by running the following prompt in Claude Code:
```
Am I logged into WireMock Cloud?
```
If logged in, you'll see your account details:
* You should see "wiremock" in the list of configured MCP servers.
### Step 4: Confirm your setup
To confirm everything is working correctly, check that you're logged in to WireMock Cloud by running the following prompt in Claude Code:
```
Am I logged into WireMock Cloud?
```
If logged in, you'll see your account details:
 * Open Settings->Developer.
* Click Edit Config and open the config file in your preferred editor.
* Add the WireMock MCP server to the file. The whole file will look like this if this is the first MCP server installed:
```json theme={null}
{
"mcpServers": {
"wiremock": {
"command": "wiremock",
"args": [
"mcp"
]
}
}
}
```
* Restart Claude Desktop.
### Step 4: Confirm your setup
To confirm everything is working correctly, check that you’re logged in to WireMock Cloud by running the following prompt:
```
Am I logged into WireMock Cloud?
```
After confirming it is OK for Claude to use the tool, if logged in, you’ll see your account details rather than being prompted to sign in.
* Navigate to **Windsurf Settings** > **Cascade** > **Plugins**.
* Click **Manage plugins** to access the raw configuration.
* Click **View raw config** to edit the `mcp_config.json` file (located at `~/.codeium/windsurf/mcp_config.json`) and add:
```json theme={null}
{
"mcpServers": {
"wiremock": {
"command": "wiremock",
"args": ["mcp"]
}
}
}
```
* Save the configuration and press the refresh button in the Plugin Store.
### Step 4: Confirm your setup
To confirm everything is working correctly, check that you're logged in to WireMock Cloud by running the following prompt in Cascade:
```
Am I logged into WireMock Cloud?
```
If logged in, you'll see your account details rather than being prompted to sign in.
## Next Steps
With WireMock MCP successfully installed, you can begin creating and using mocks in your development workflow:
### Generate a new feature and mock a new API
Develop a new feature in your application that calls a fresh API. Quickly generate a WireMock stub for this API, and then wire it up to your app while in development mode.
### Swap an existing API connection for a mock
If you have an existing real API integration, you can replace it with a WireMock Cloud mock. Generate the mock from documentation, source code, or other external description formats. This enables you to test your app in isolation without depending on live services.
* Open Settings->Developer.
* Click Edit Config and open the config file in your preferred editor.
* Add the WireMock MCP server to the file. The whole file will look like this if this is the first MCP server installed:
```json theme={null}
{
"mcpServers": {
"wiremock": {
"command": "wiremock",
"args": [
"mcp"
]
}
}
}
```
* Restart Claude Desktop.
### Step 4: Confirm your setup
To confirm everything is working correctly, check that you’re logged in to WireMock Cloud by running the following prompt:
```
Am I logged into WireMock Cloud?
```
After confirming it is OK for Claude to use the tool, if logged in, you’ll see your account details rather than being prompted to sign in.
* Navigate to **Windsurf Settings** > **Cascade** > **Plugins**.
* Click **Manage plugins** to access the raw configuration.
* Click **View raw config** to edit the `mcp_config.json` file (located at `~/.codeium/windsurf/mcp_config.json`) and add:
```json theme={null}
{
"mcpServers": {
"wiremock": {
"command": "wiremock",
"args": ["mcp"]
}
}
}
```
* Save the configuration and press the refresh button in the Plugin Store.
### Step 4: Confirm your setup
To confirm everything is working correctly, check that you're logged in to WireMock Cloud by running the following prompt in Cascade:
```
Am I logged into WireMock Cloud?
```
If logged in, you'll see your account details rather than being prompted to sign in.
## Next Steps
With WireMock MCP successfully installed, you can begin creating and using mocks in your development workflow:
### Generate a new feature and mock a new API
Develop a new feature in your application that calls a fresh API. Quickly generate a WireMock stub for this API, and then wire it up to your app while in development mode.
### Swap an existing API connection for a mock
If you have an existing real API integration, you can replace it with a WireMock Cloud mock. Generate the mock from documentation, source code, or other external description formats. This enables you to test your app in isolation without depending on live services.